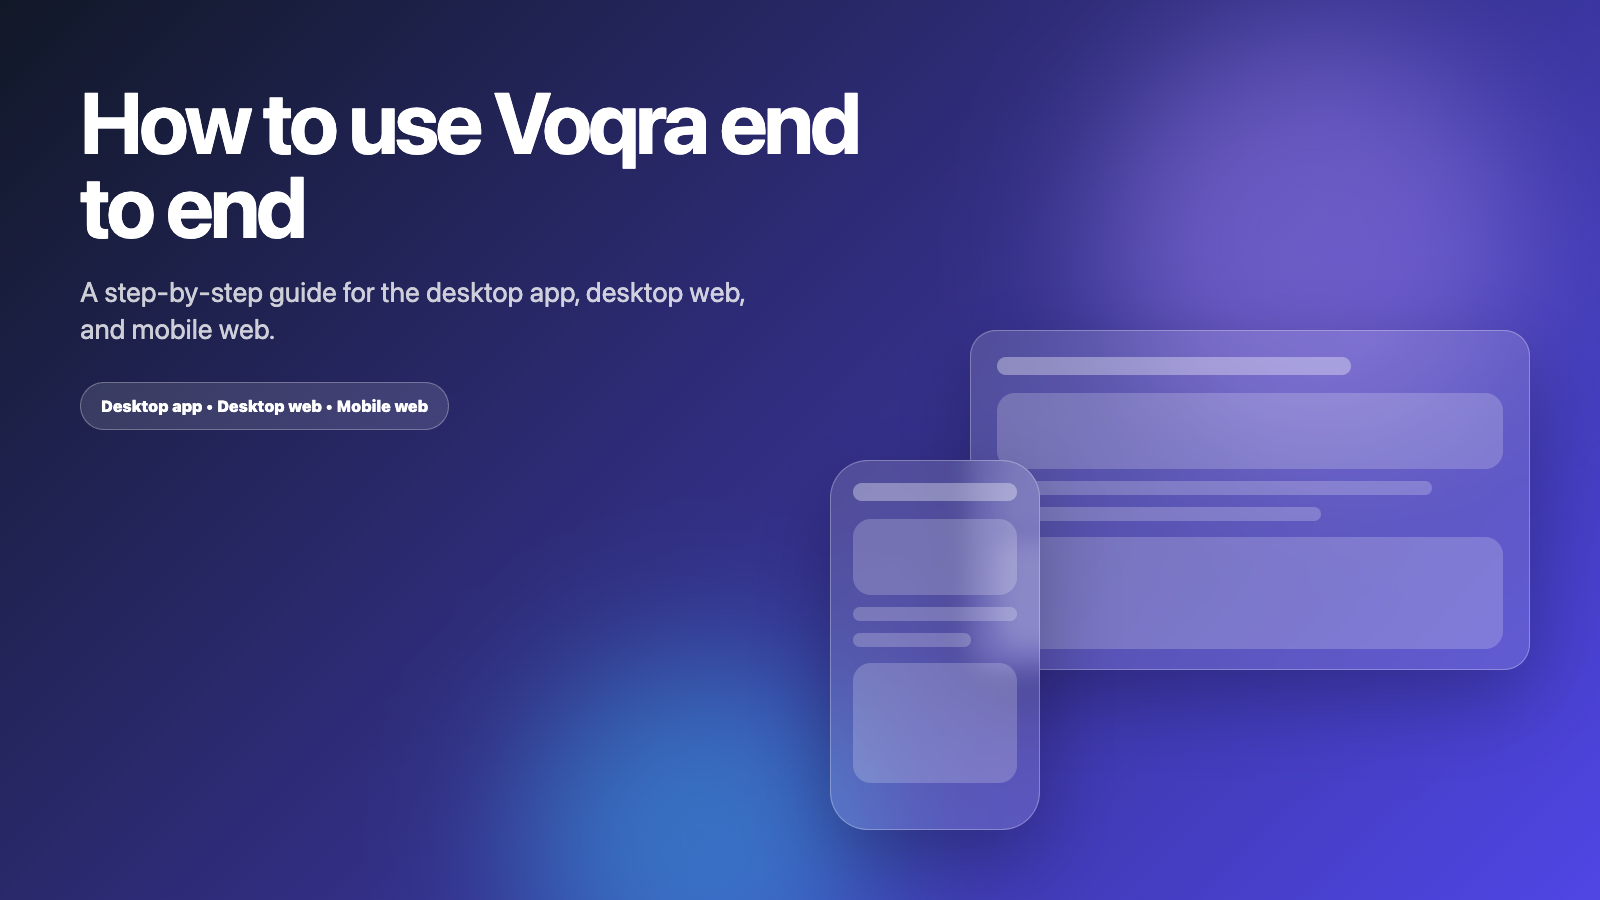
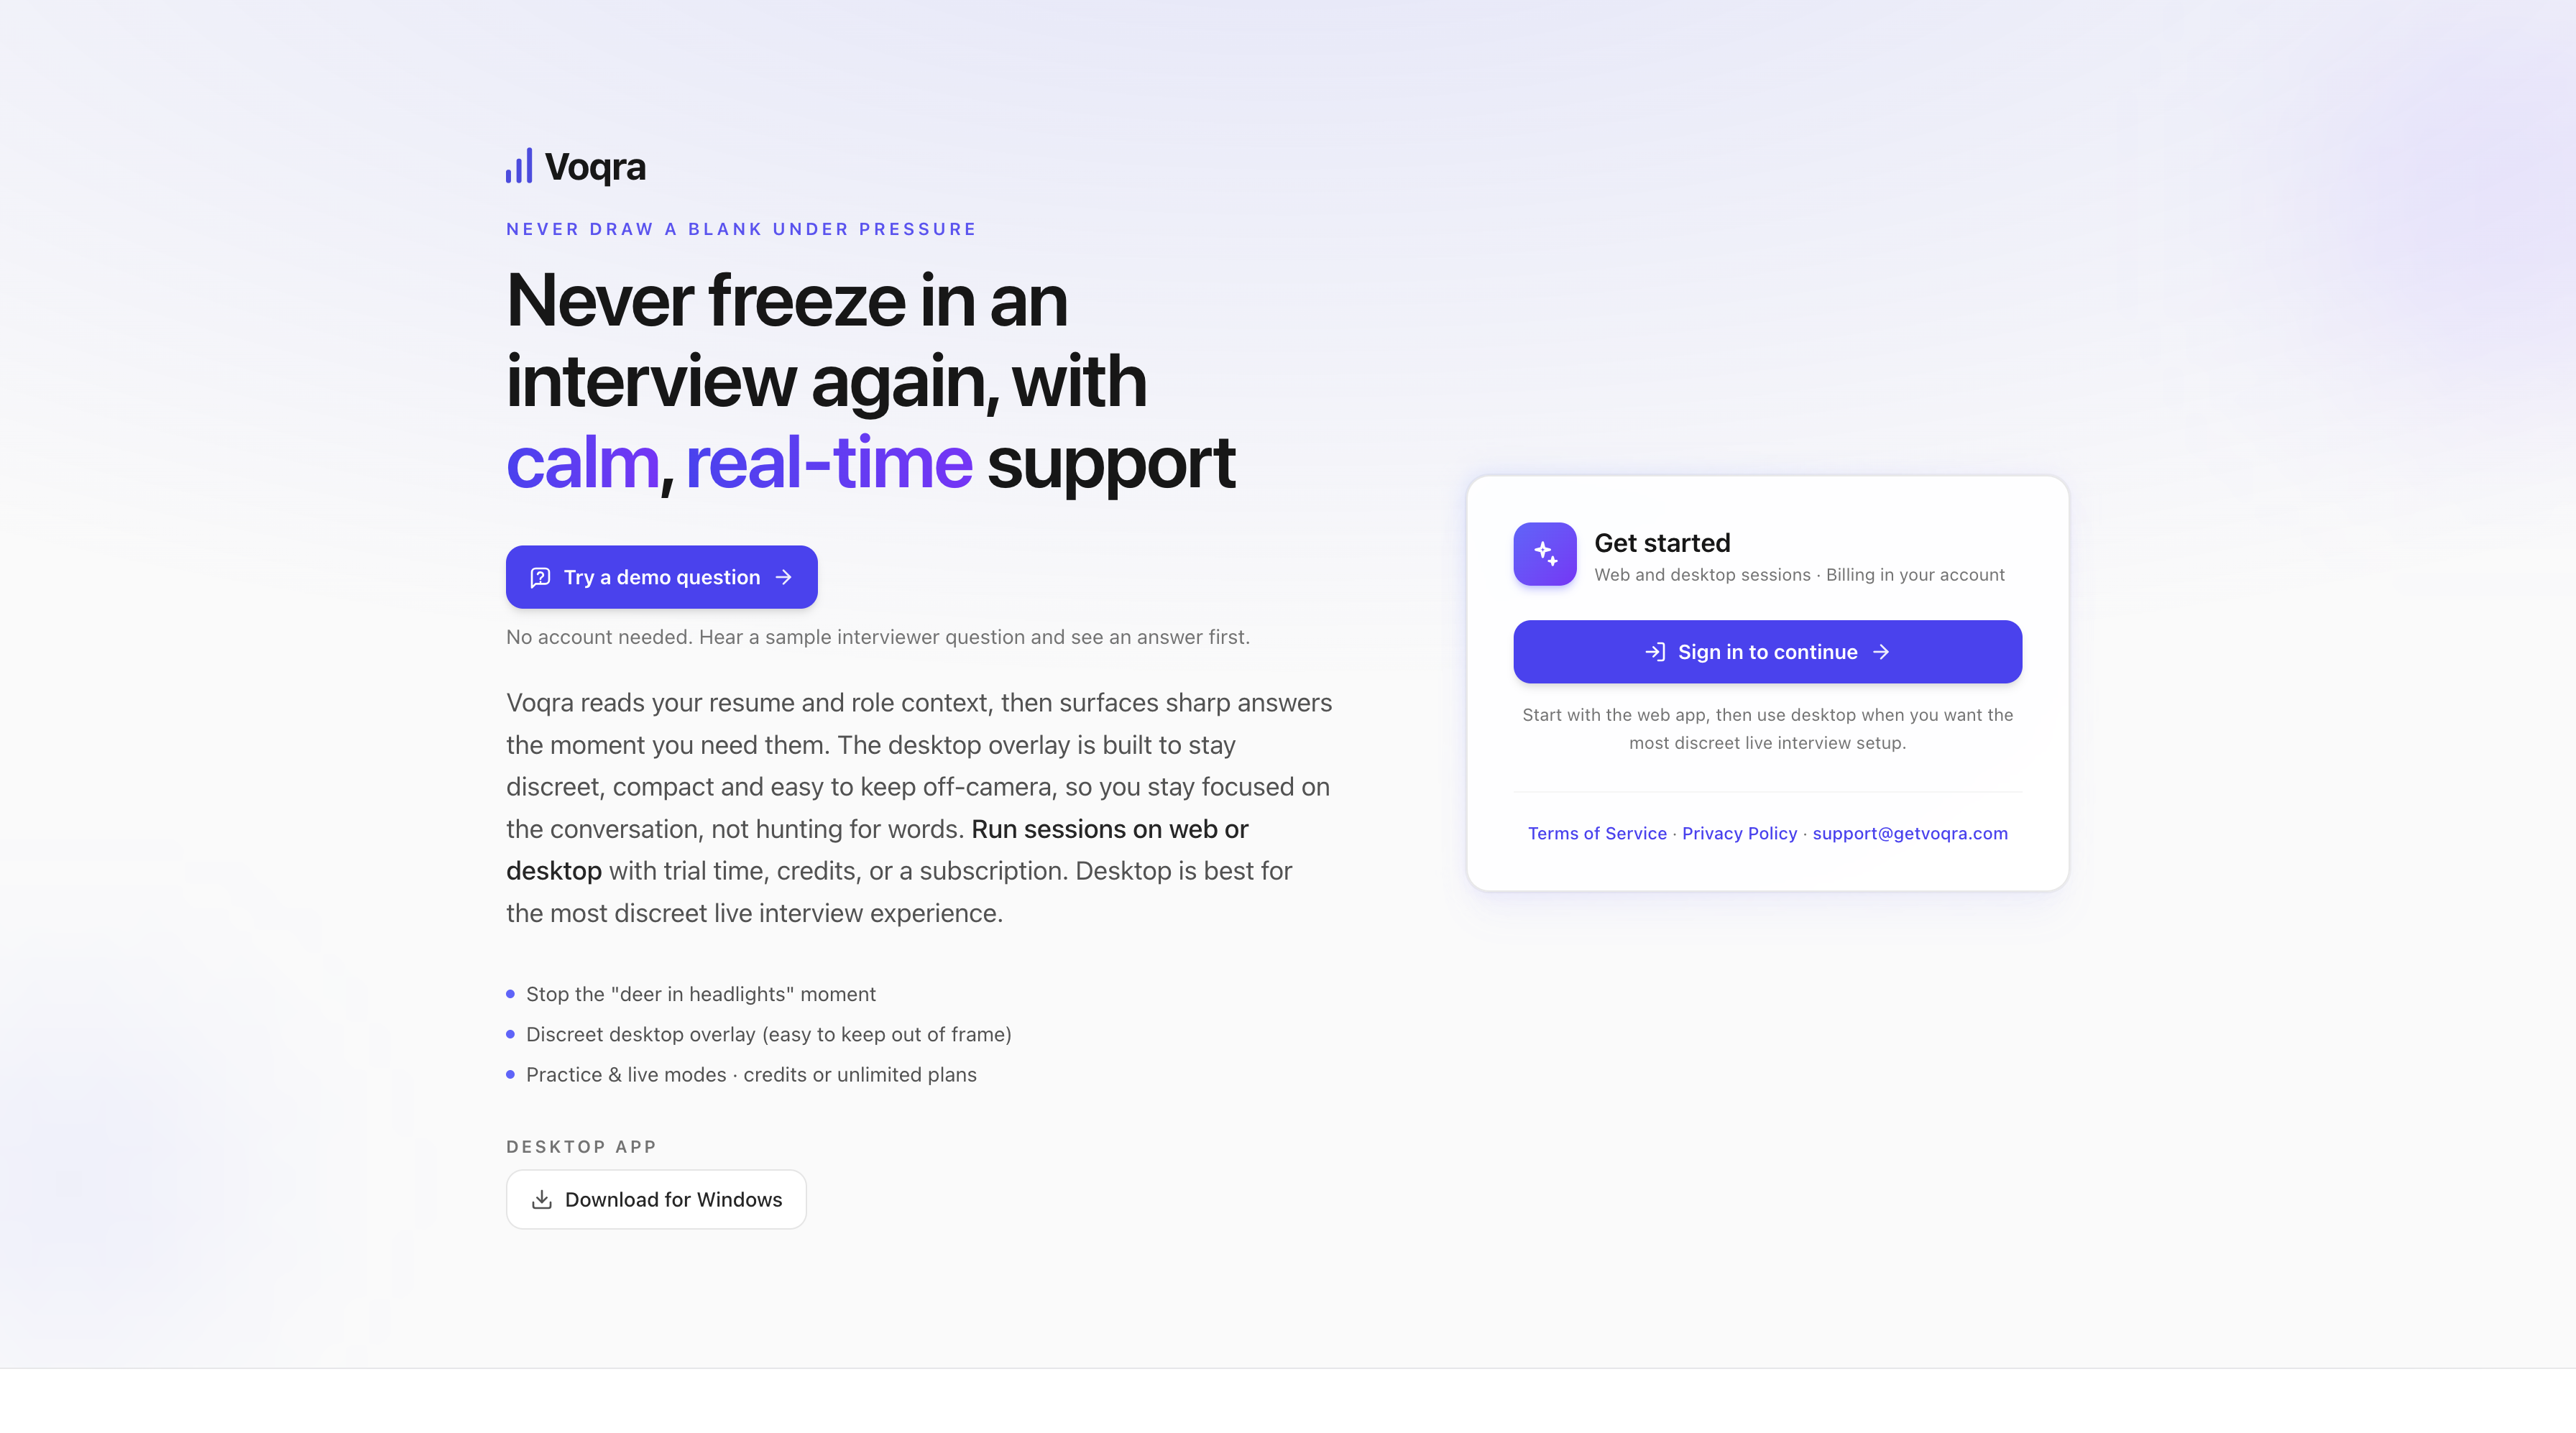
How to Use Voqra: Desktop App, Desktop Web, and Mobile Web Guide
A step-by-step Voqra app guide with screenshots for the desktop app, desktop web, and mobile web, from setup to live interview support.
This guide shows how to use Voqra from start to finish across three ways of accessing the app:
- the desktop app
- desktop web
- mobile web
The best option depends on where you are and what kind of interview support you need. If you are preparing for a real live interview, use the desktop app when possible. If you are setting up from a browser, reviewing past sessions, or using a laptop without the desktop app installed, desktop web is a good fallback. If you are on your phone, mobile web is useful for setup, typed questions, microphone-based practice, and review.
If you want a broader explanation of the product category, start with what an AI interview assistant does. If you already know you want live support, this guide walks through the practical steps.
Which version should you use?
Use this quick comparison before you start.
| Version | Best for | Use when |
|---|---|---|
| Desktop app | Real live interviews | You want the smoothest overlay, audio, and screen-read flow |
| Desktop web | Browser-based setup and live support | You are on a laptop and want dashboard, history, setup, and supported browser live sessions |
| Mobile web | Setup, practice, and review | You are on your phone and want to prepare, type questions, use your mic, or review answers |
The rest of this guide walks through each path end to end.
Before you start
No matter which version you use, Voqra works better when you provide enough interview context. Before starting a session, have these ready:
- the company name
- the role or job title
- your resume
- the job description
- any prep notes you want Voqra to use
- the interview language
- whether you are doing a live interview or practice session
You do not need perfect notes. Short, specific context is better than a long document full of unrelated details.
For example, useful prep notes might include:
- “Final round with hiring manager”
- “Focus on product strategy and cross-functional work”
- “I want help keeping behavioral answers concise”
- “The role emphasizes customer research and stakeholder communication”
Desktop app guide
The desktop app is the recommended path for real live interviews. It is built for the live overlay, meeting audio, and screen-read workflow.
Step 1: Sign in to the desktop app
Open Voqra and choose Sign In. The desktop app opens your browser for secure authentication, then returns you to the app.
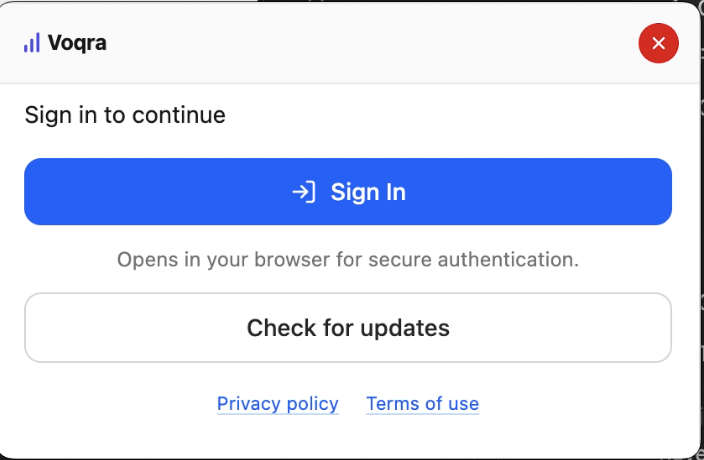
You can also check for updates before a real interview. If your interview is soon, sign in early enough to handle updates or permissions without rushing.
Step 2: Add company and role information
After signing in, choose the session mode and enter the company and job role.
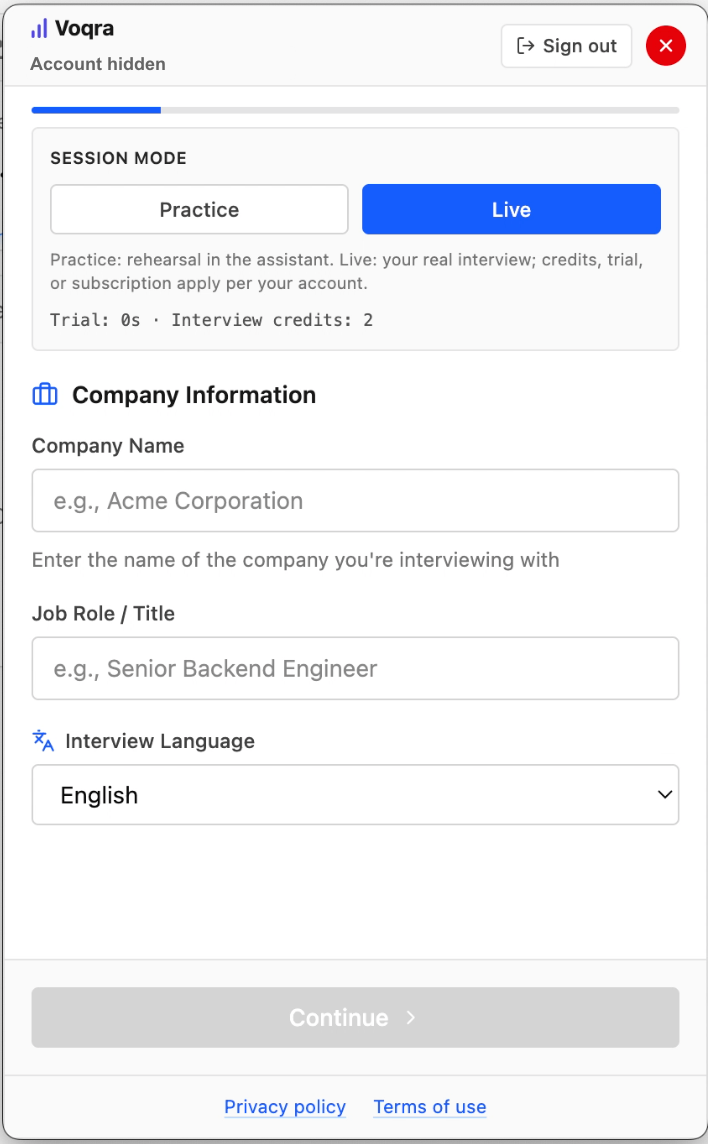
Use Live for a real interview. Use Practice when you want to rehearse before the call. The company name and job title help Voqra shape answer suggestions around the actual role.
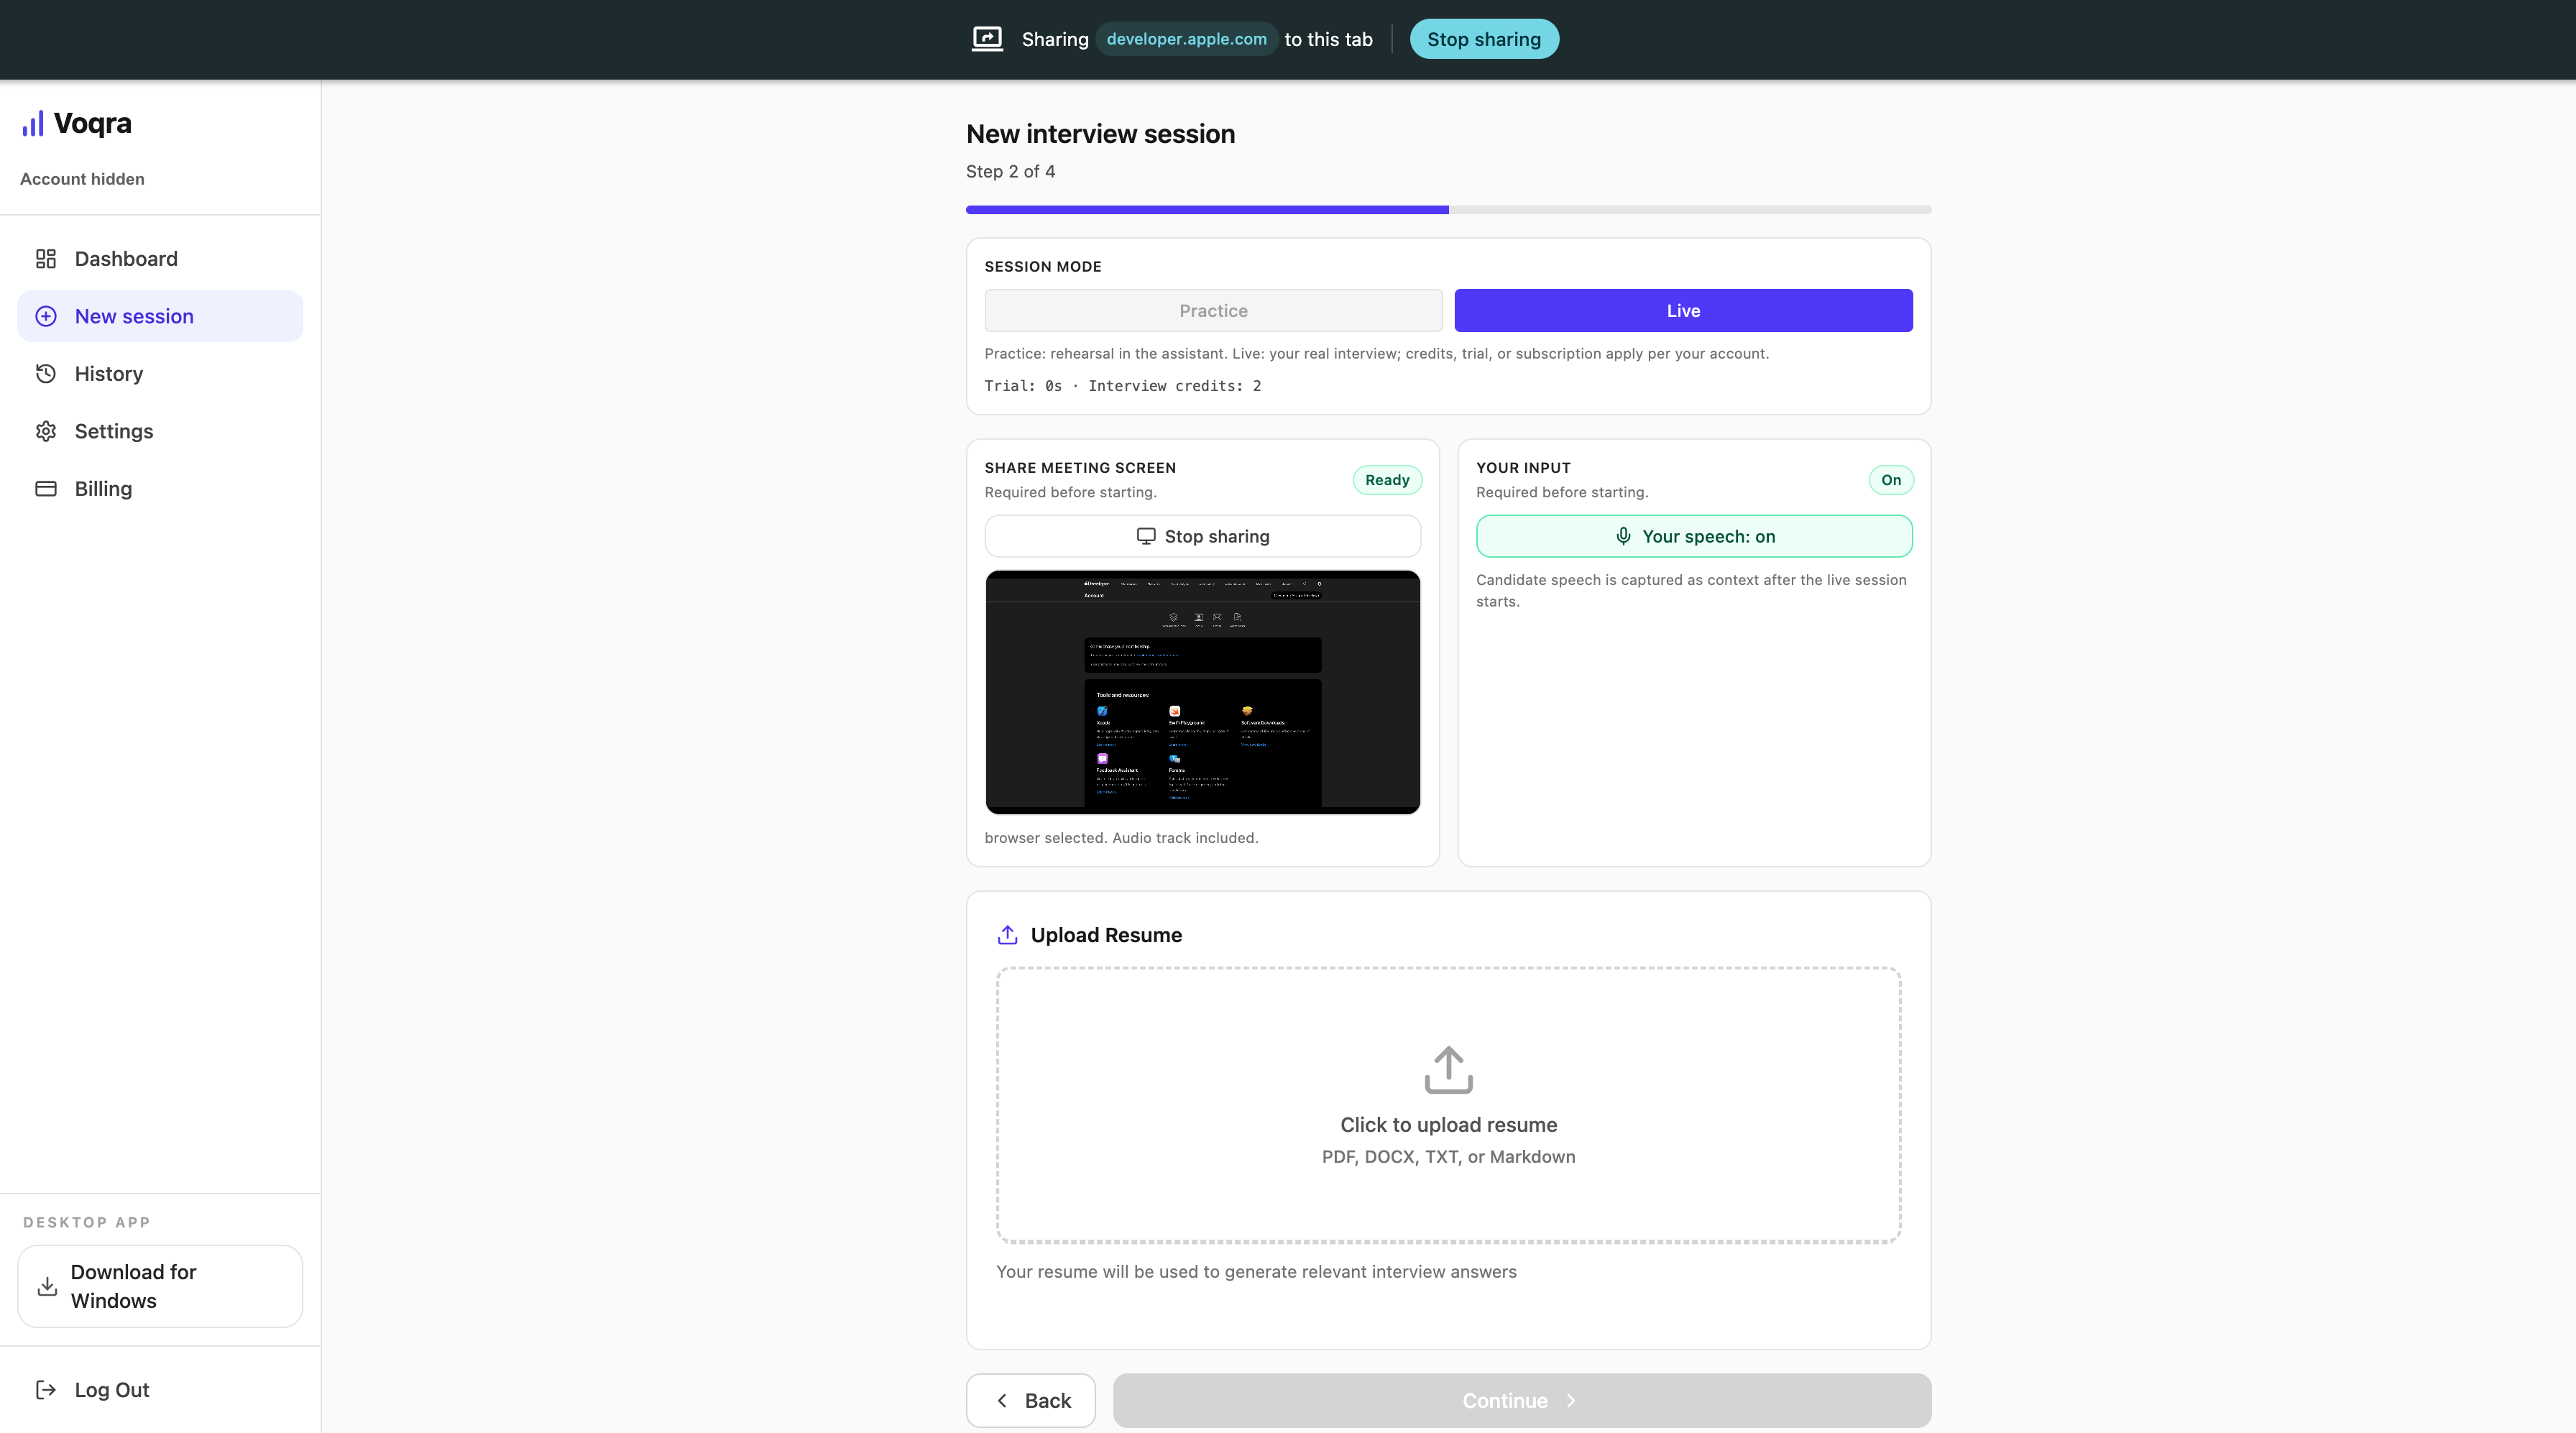
Step 3: Upload your resume
Upload your resume so Voqra can connect answers to your real experience.
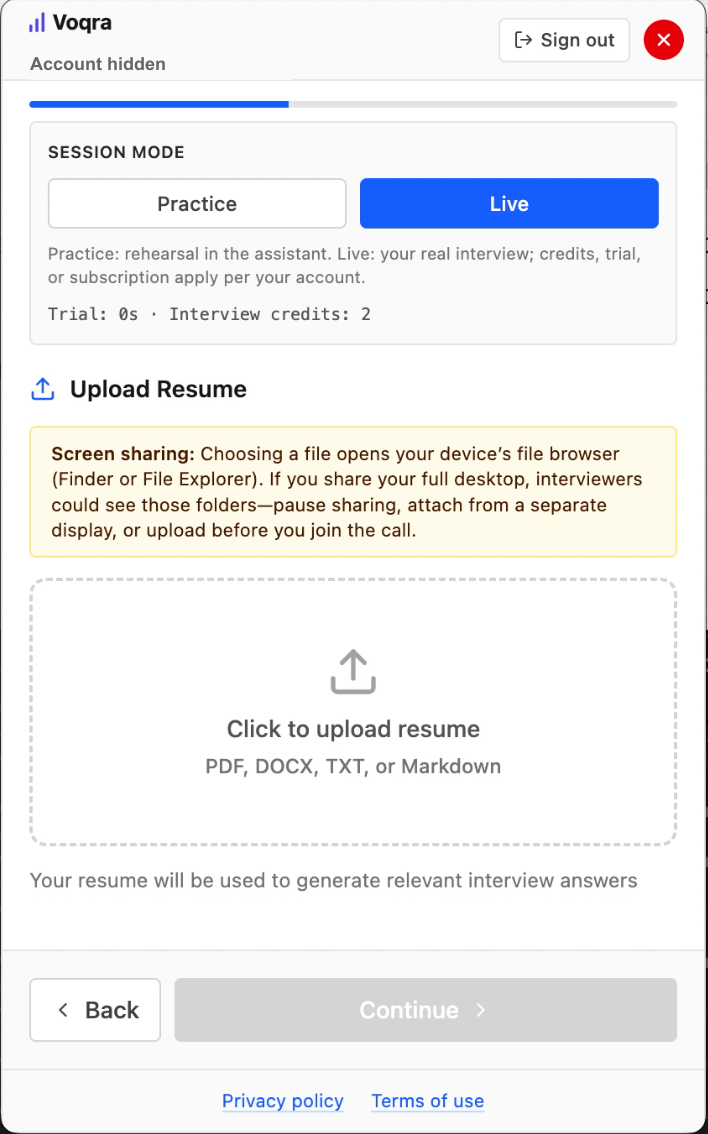
The desktop app accepts common resume formats such as PDF, DOCX, TXT, or Markdown. If you are sharing your screen during setup, be careful not to expose private files or folders to interviewers.
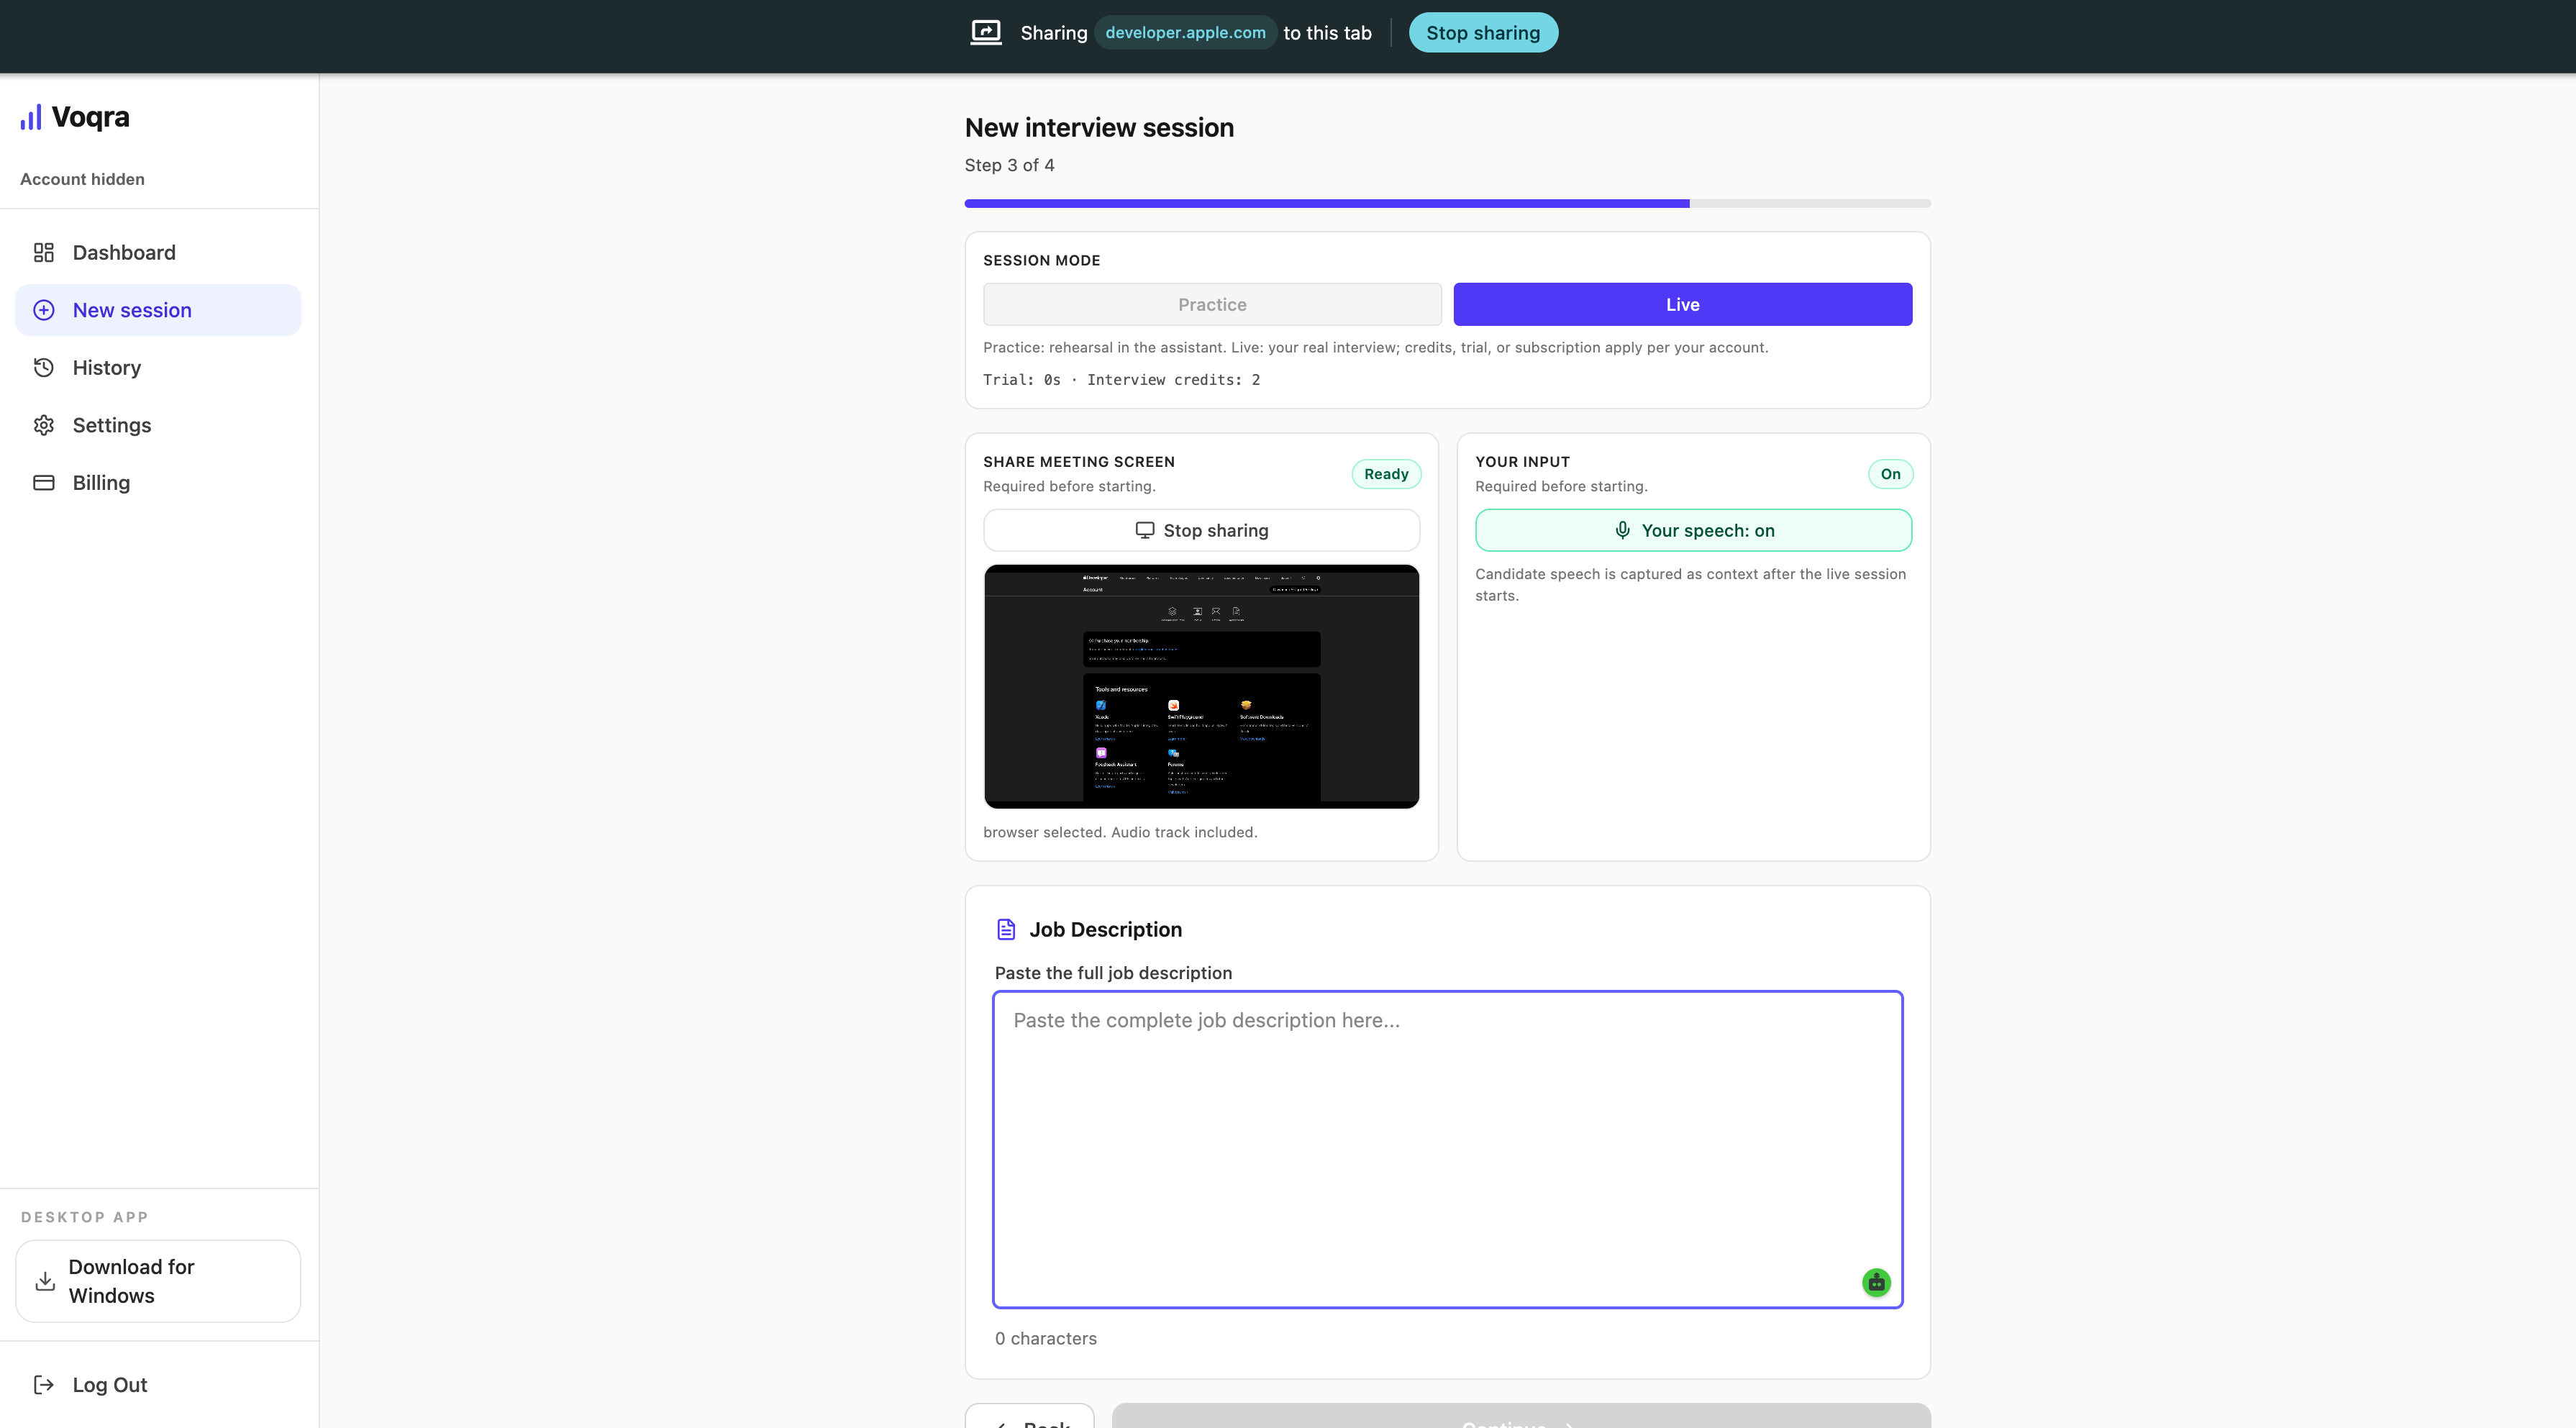
Step 4: Paste the job description
Paste the full job description into the setup flow.
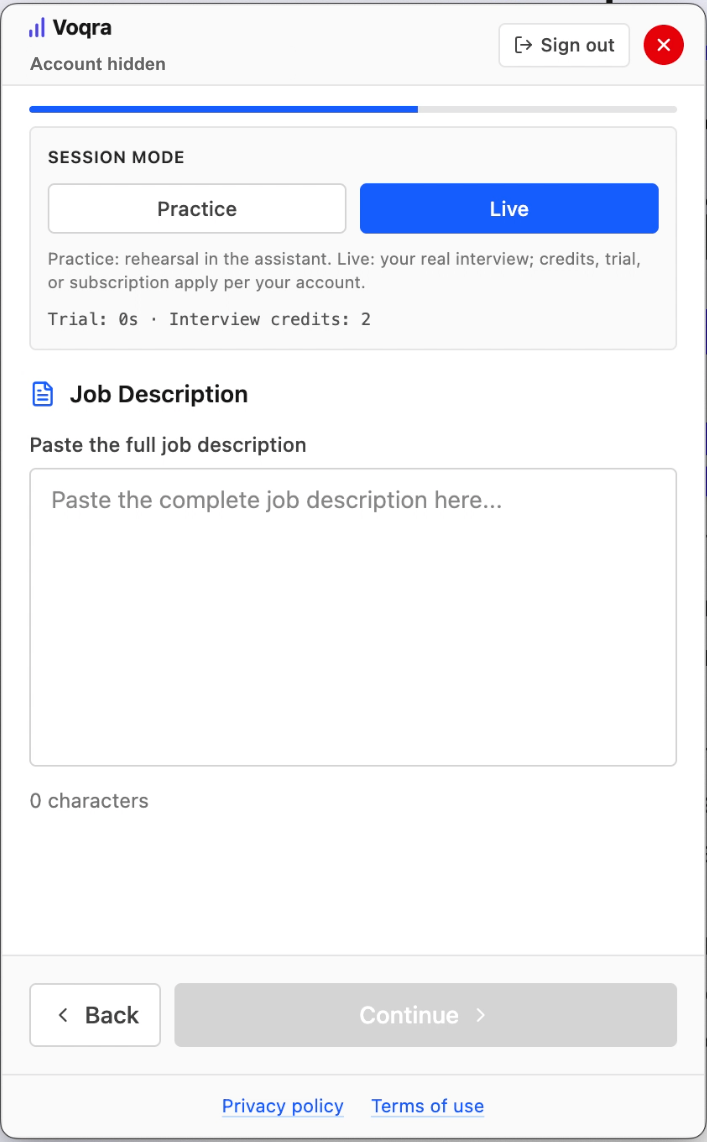
This gives Voqra the role requirements, skills, and language the interviewer is likely to care about. A complete job description usually produces more relevant answer structure than a short title alone.
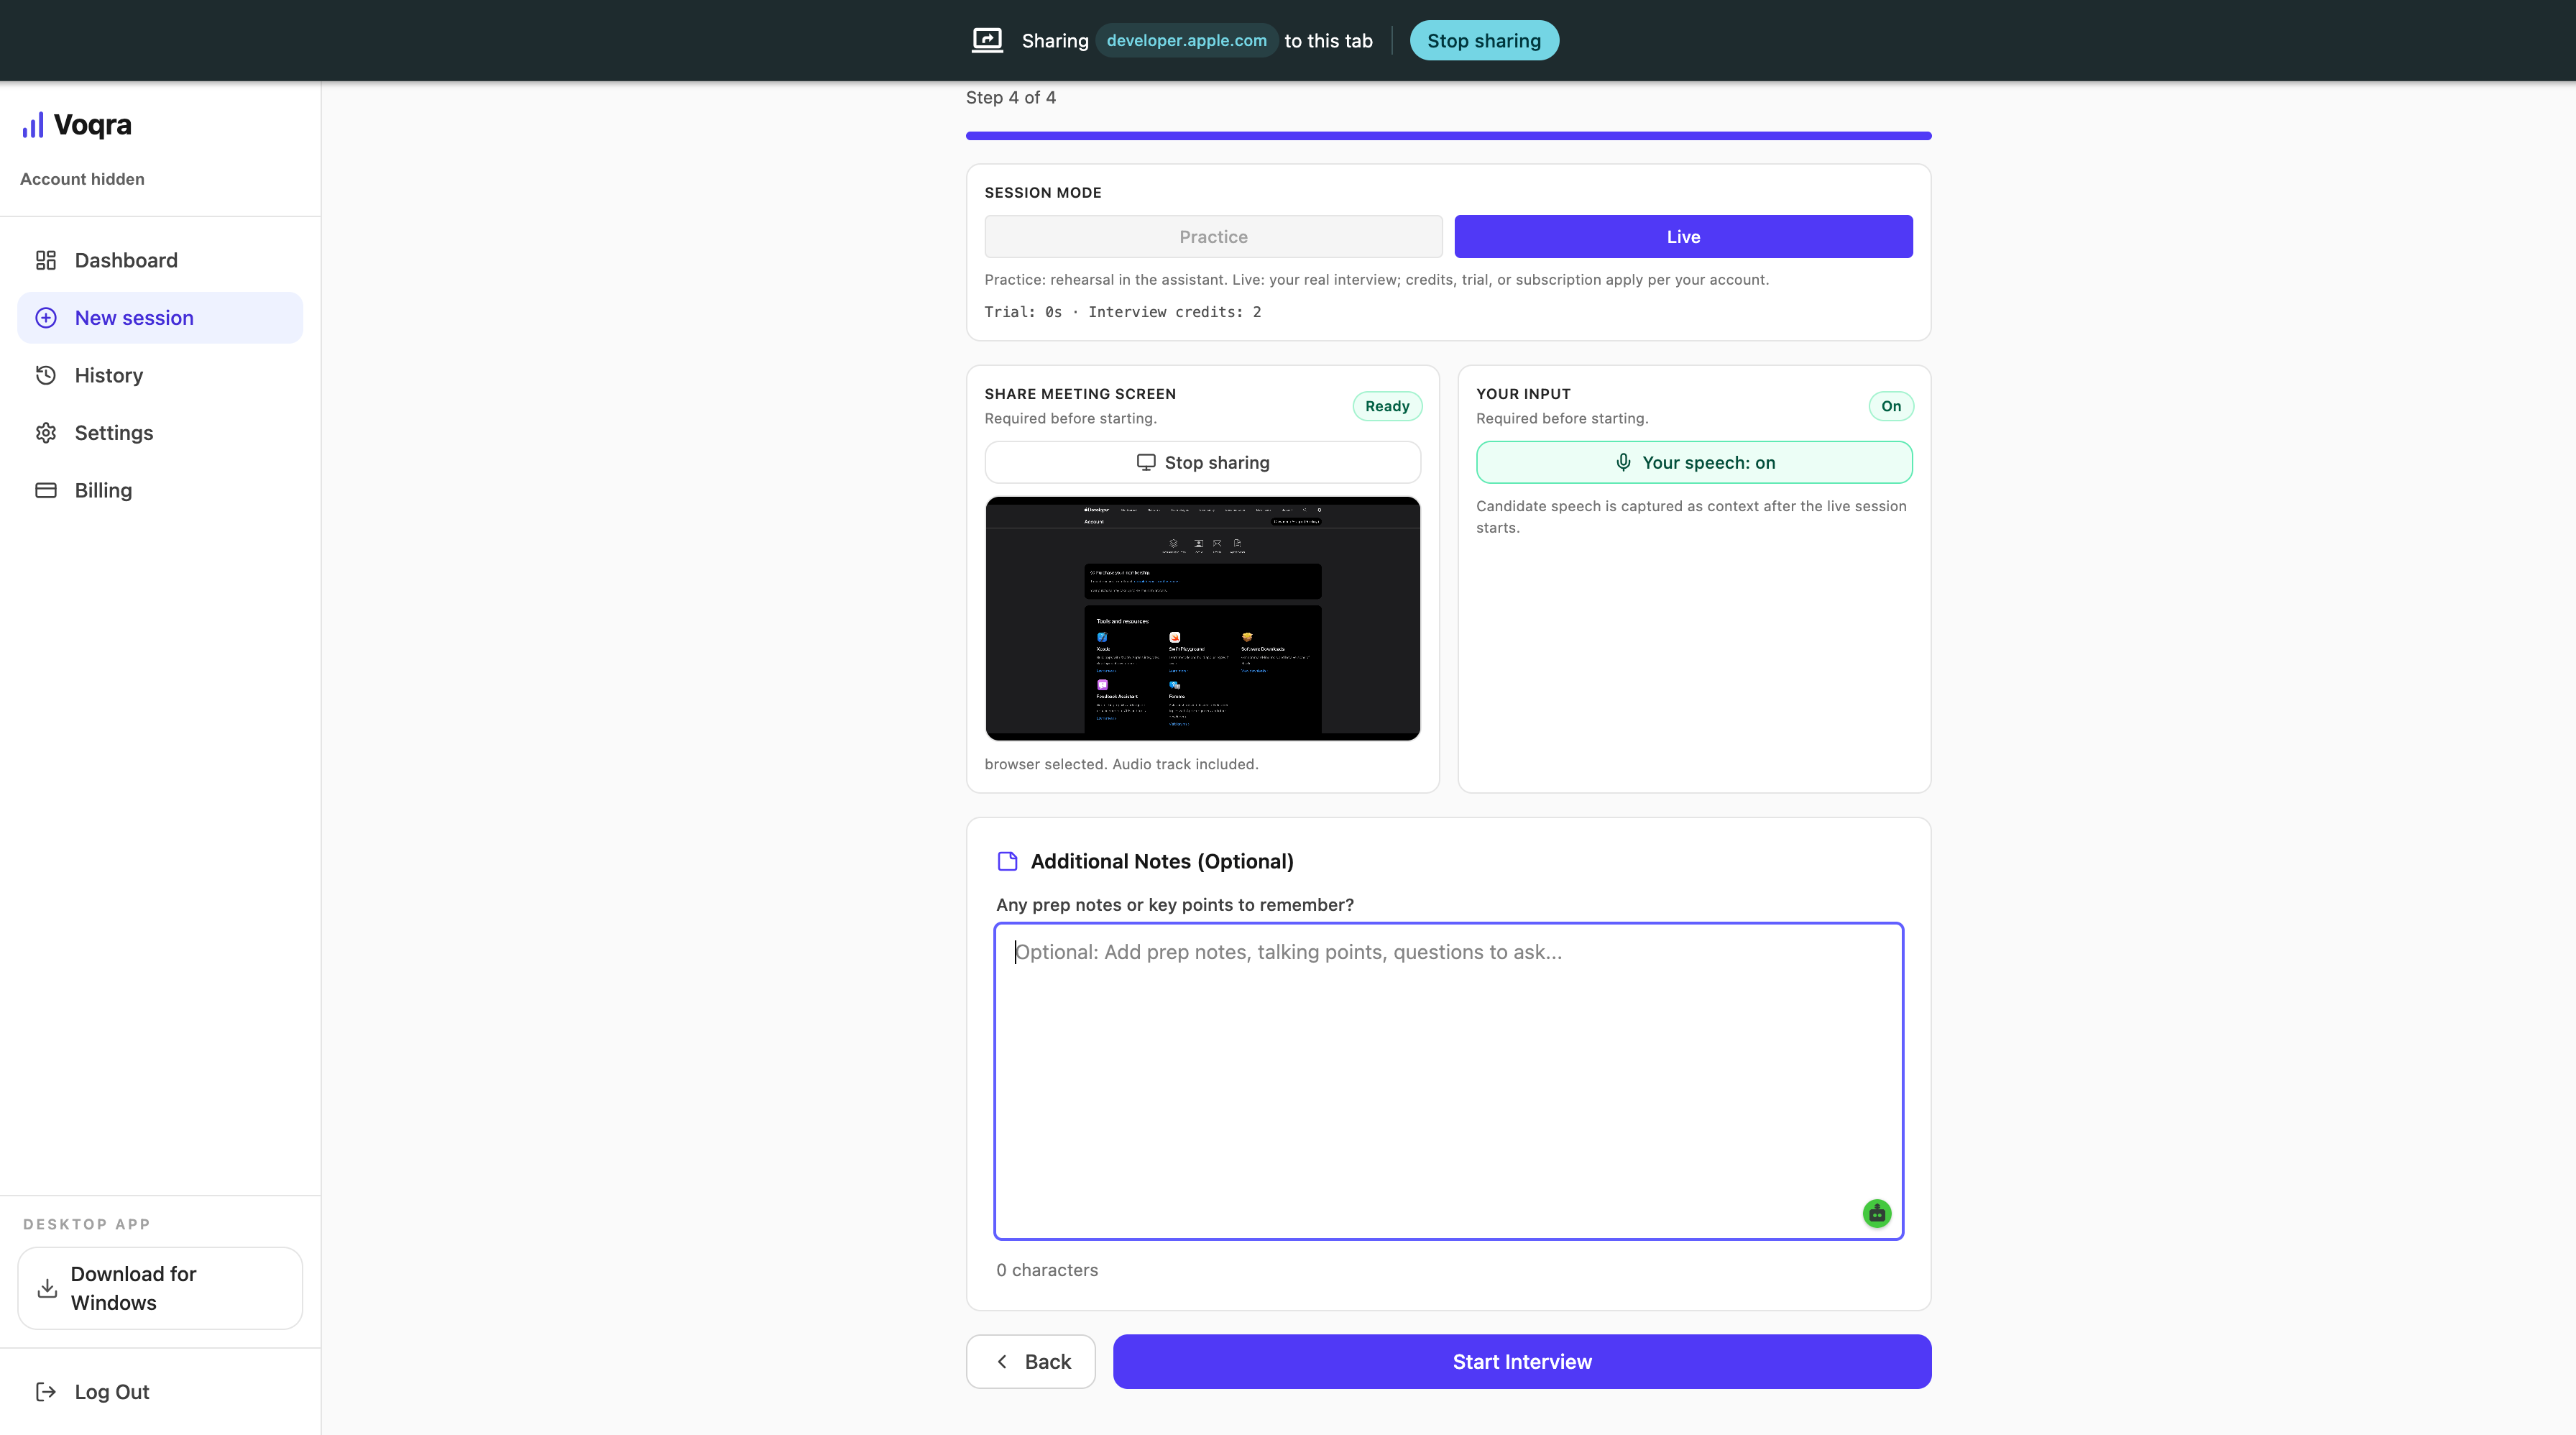
Step 5: Add optional prep notes
Add any notes you want Voqra to remember during the session.
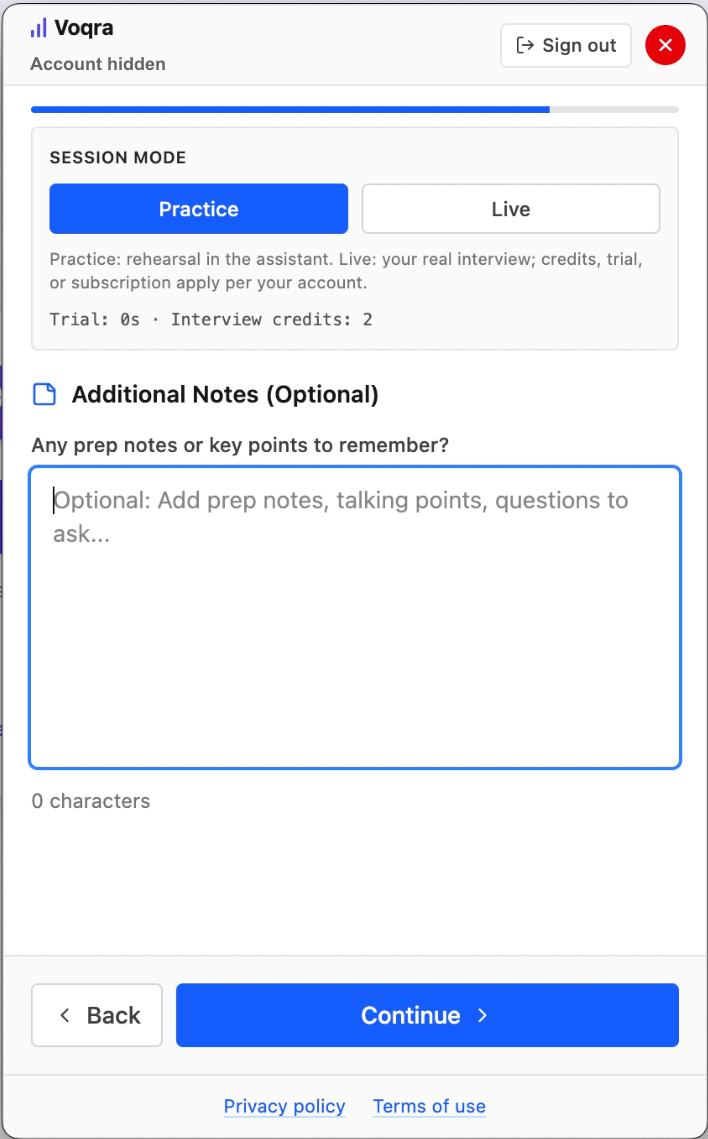
Good notes are short and specific. For example:
- “Final round with hiring manager”
- “Emphasize customer research and product strategy”
- “Keep behavioral answers concise”
- “Prepare for questions about cross-functional work”
Step 6: Pick the screen and start the interview
Choose the screen Voqra should read when answers need shared-screen context, then select Start Interview.
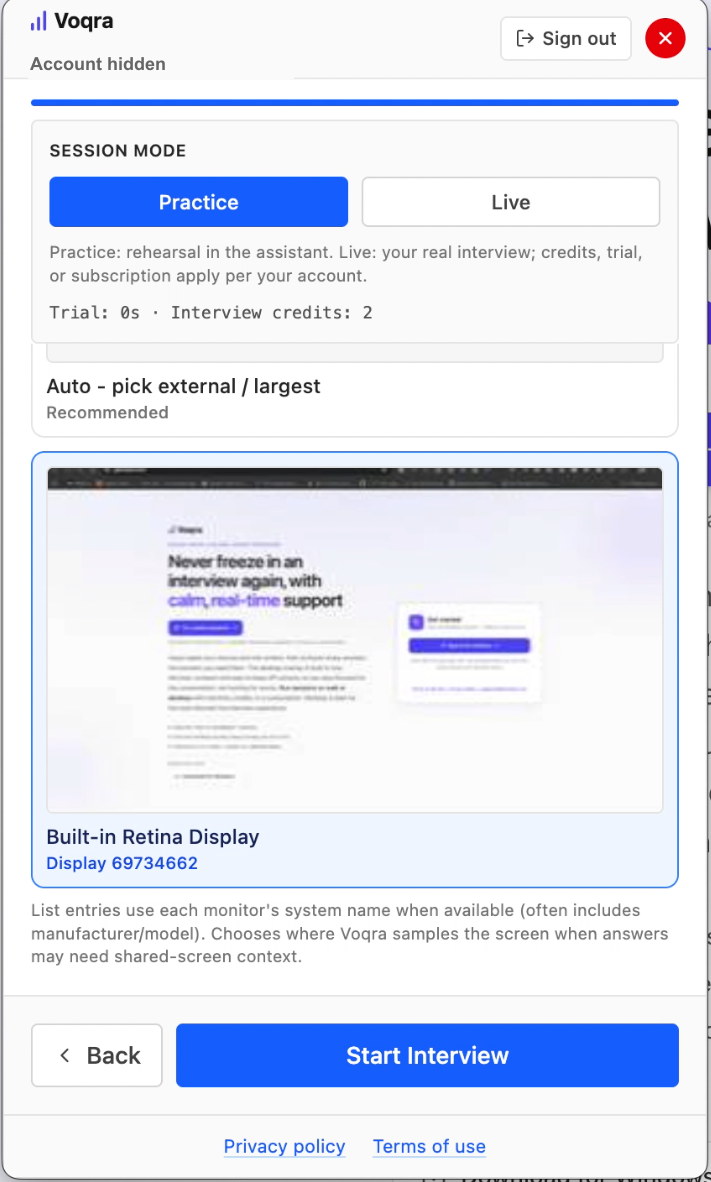
Use the recommended auto option unless you know exactly which display you want Voqra to sample. This is especially useful for coding prompts, slides, shared documents, or visual interview tasks.
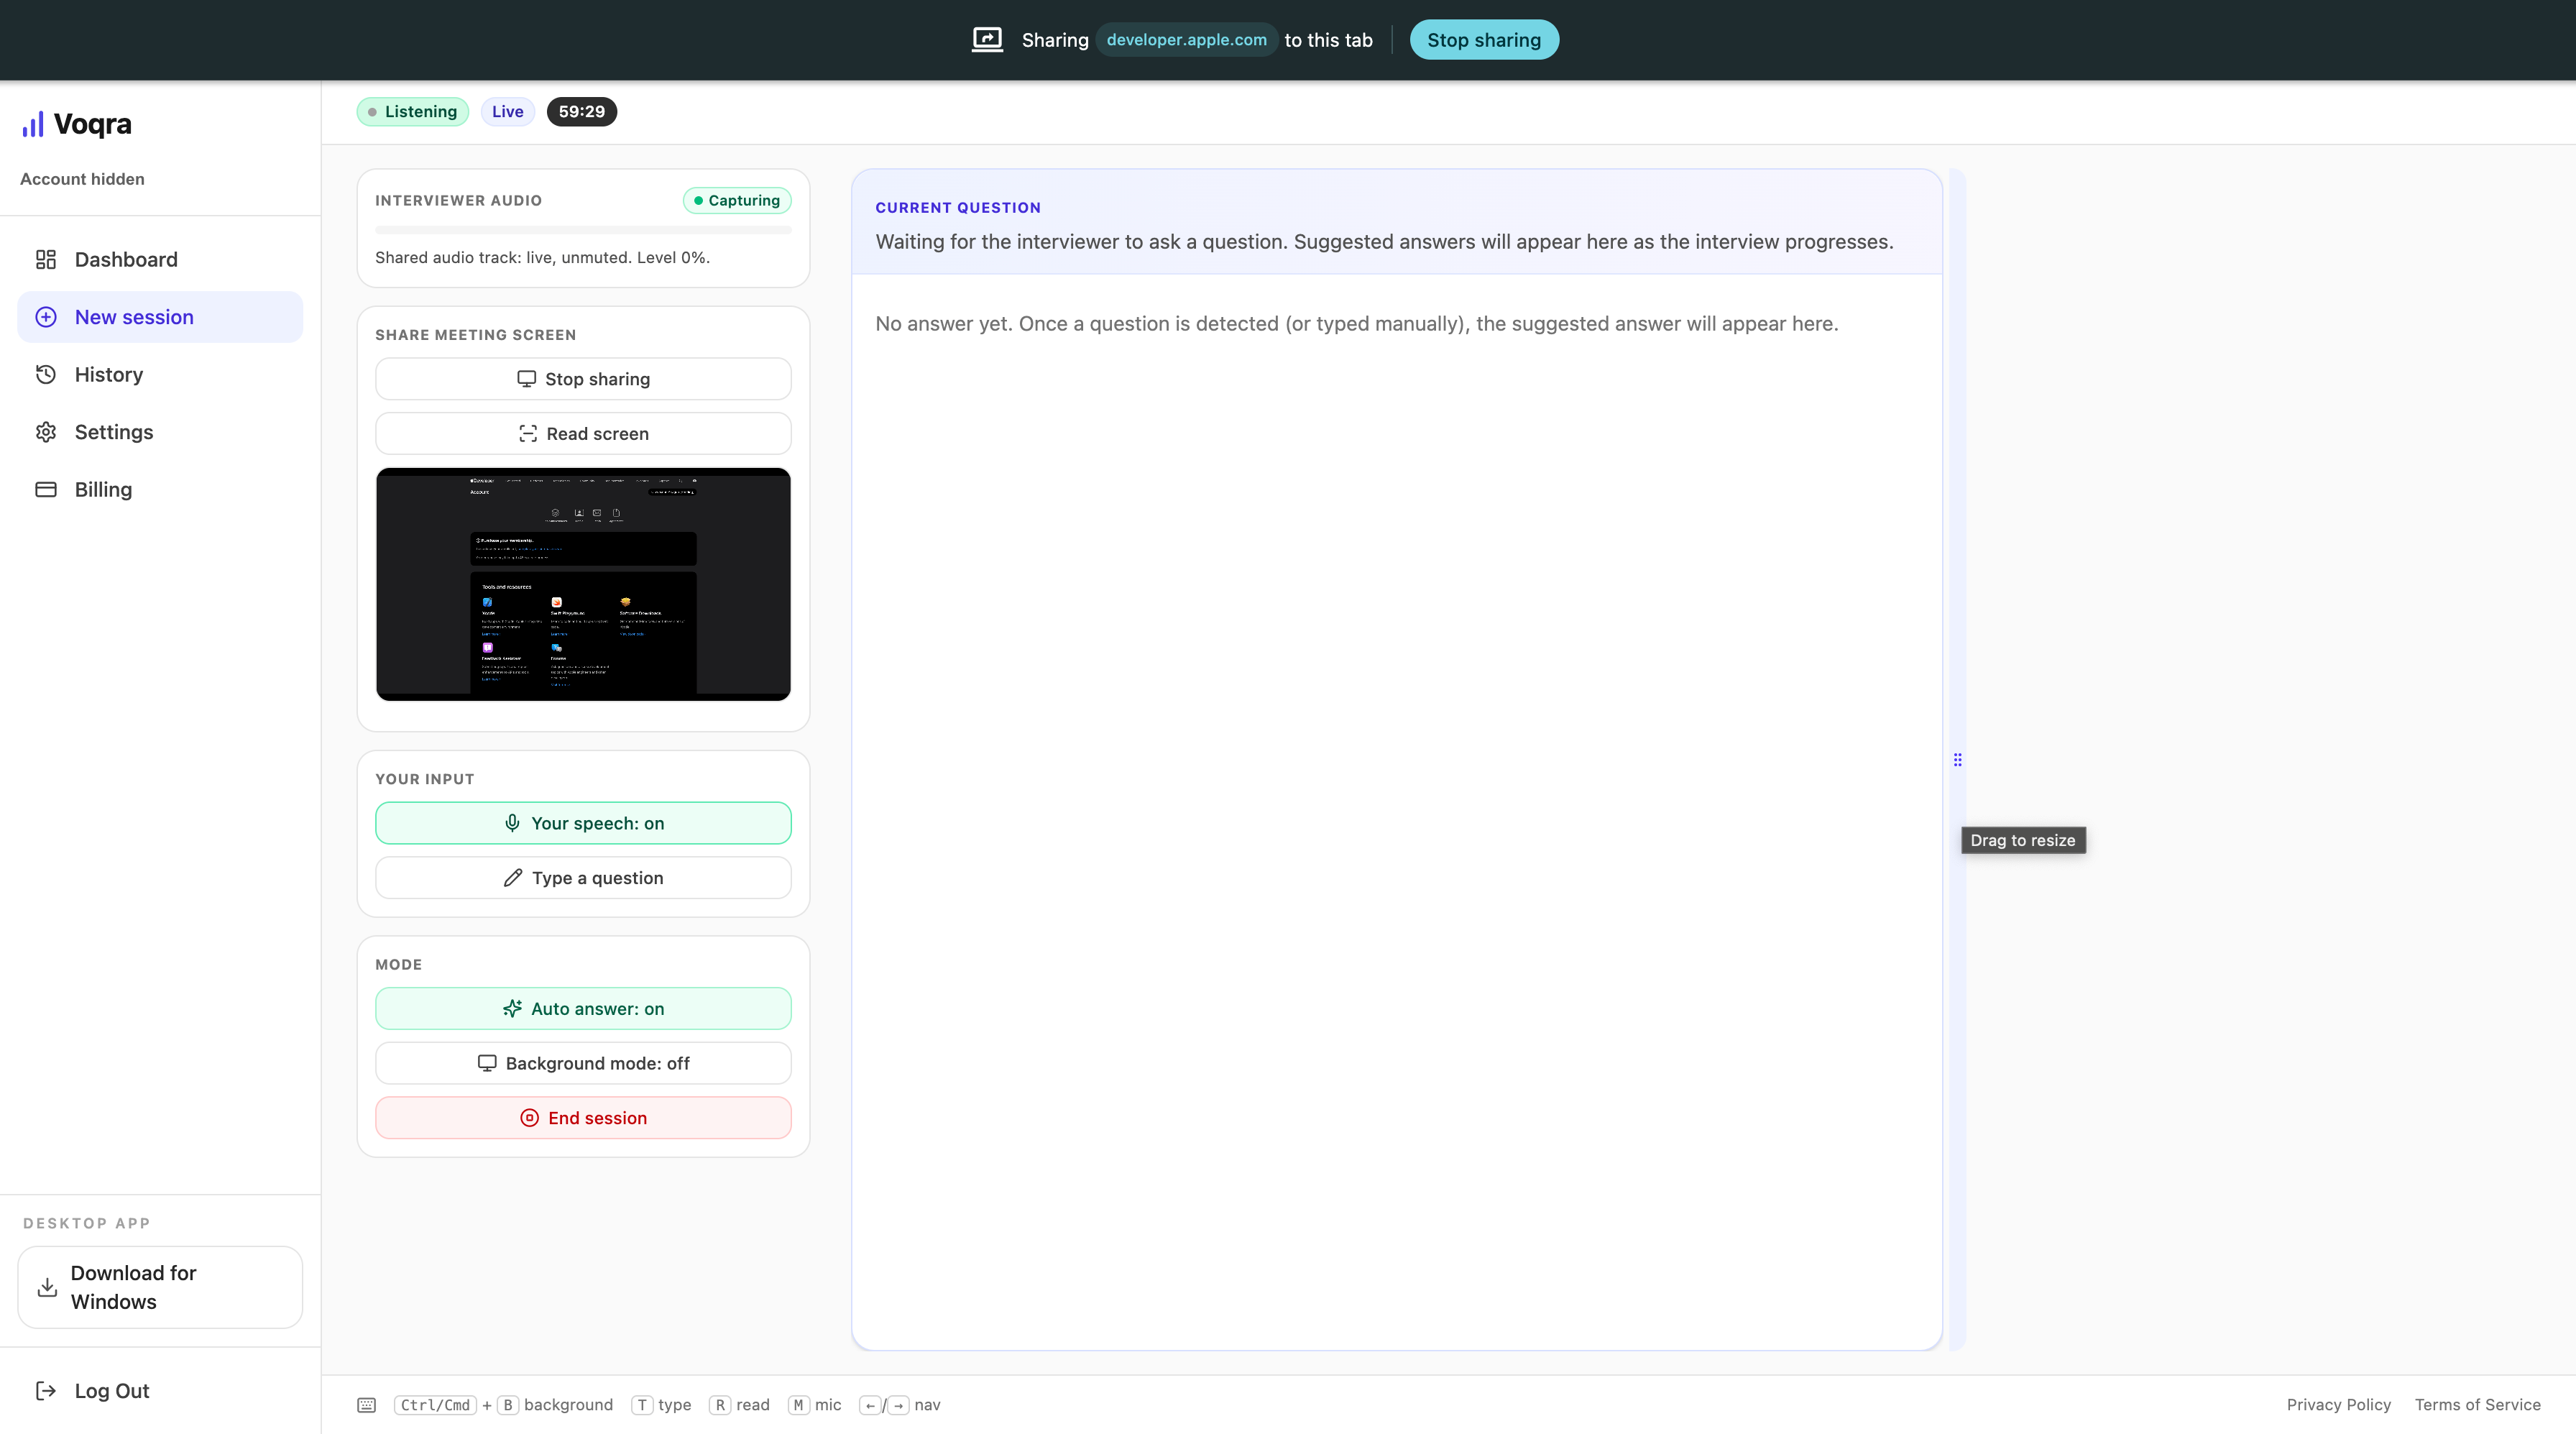
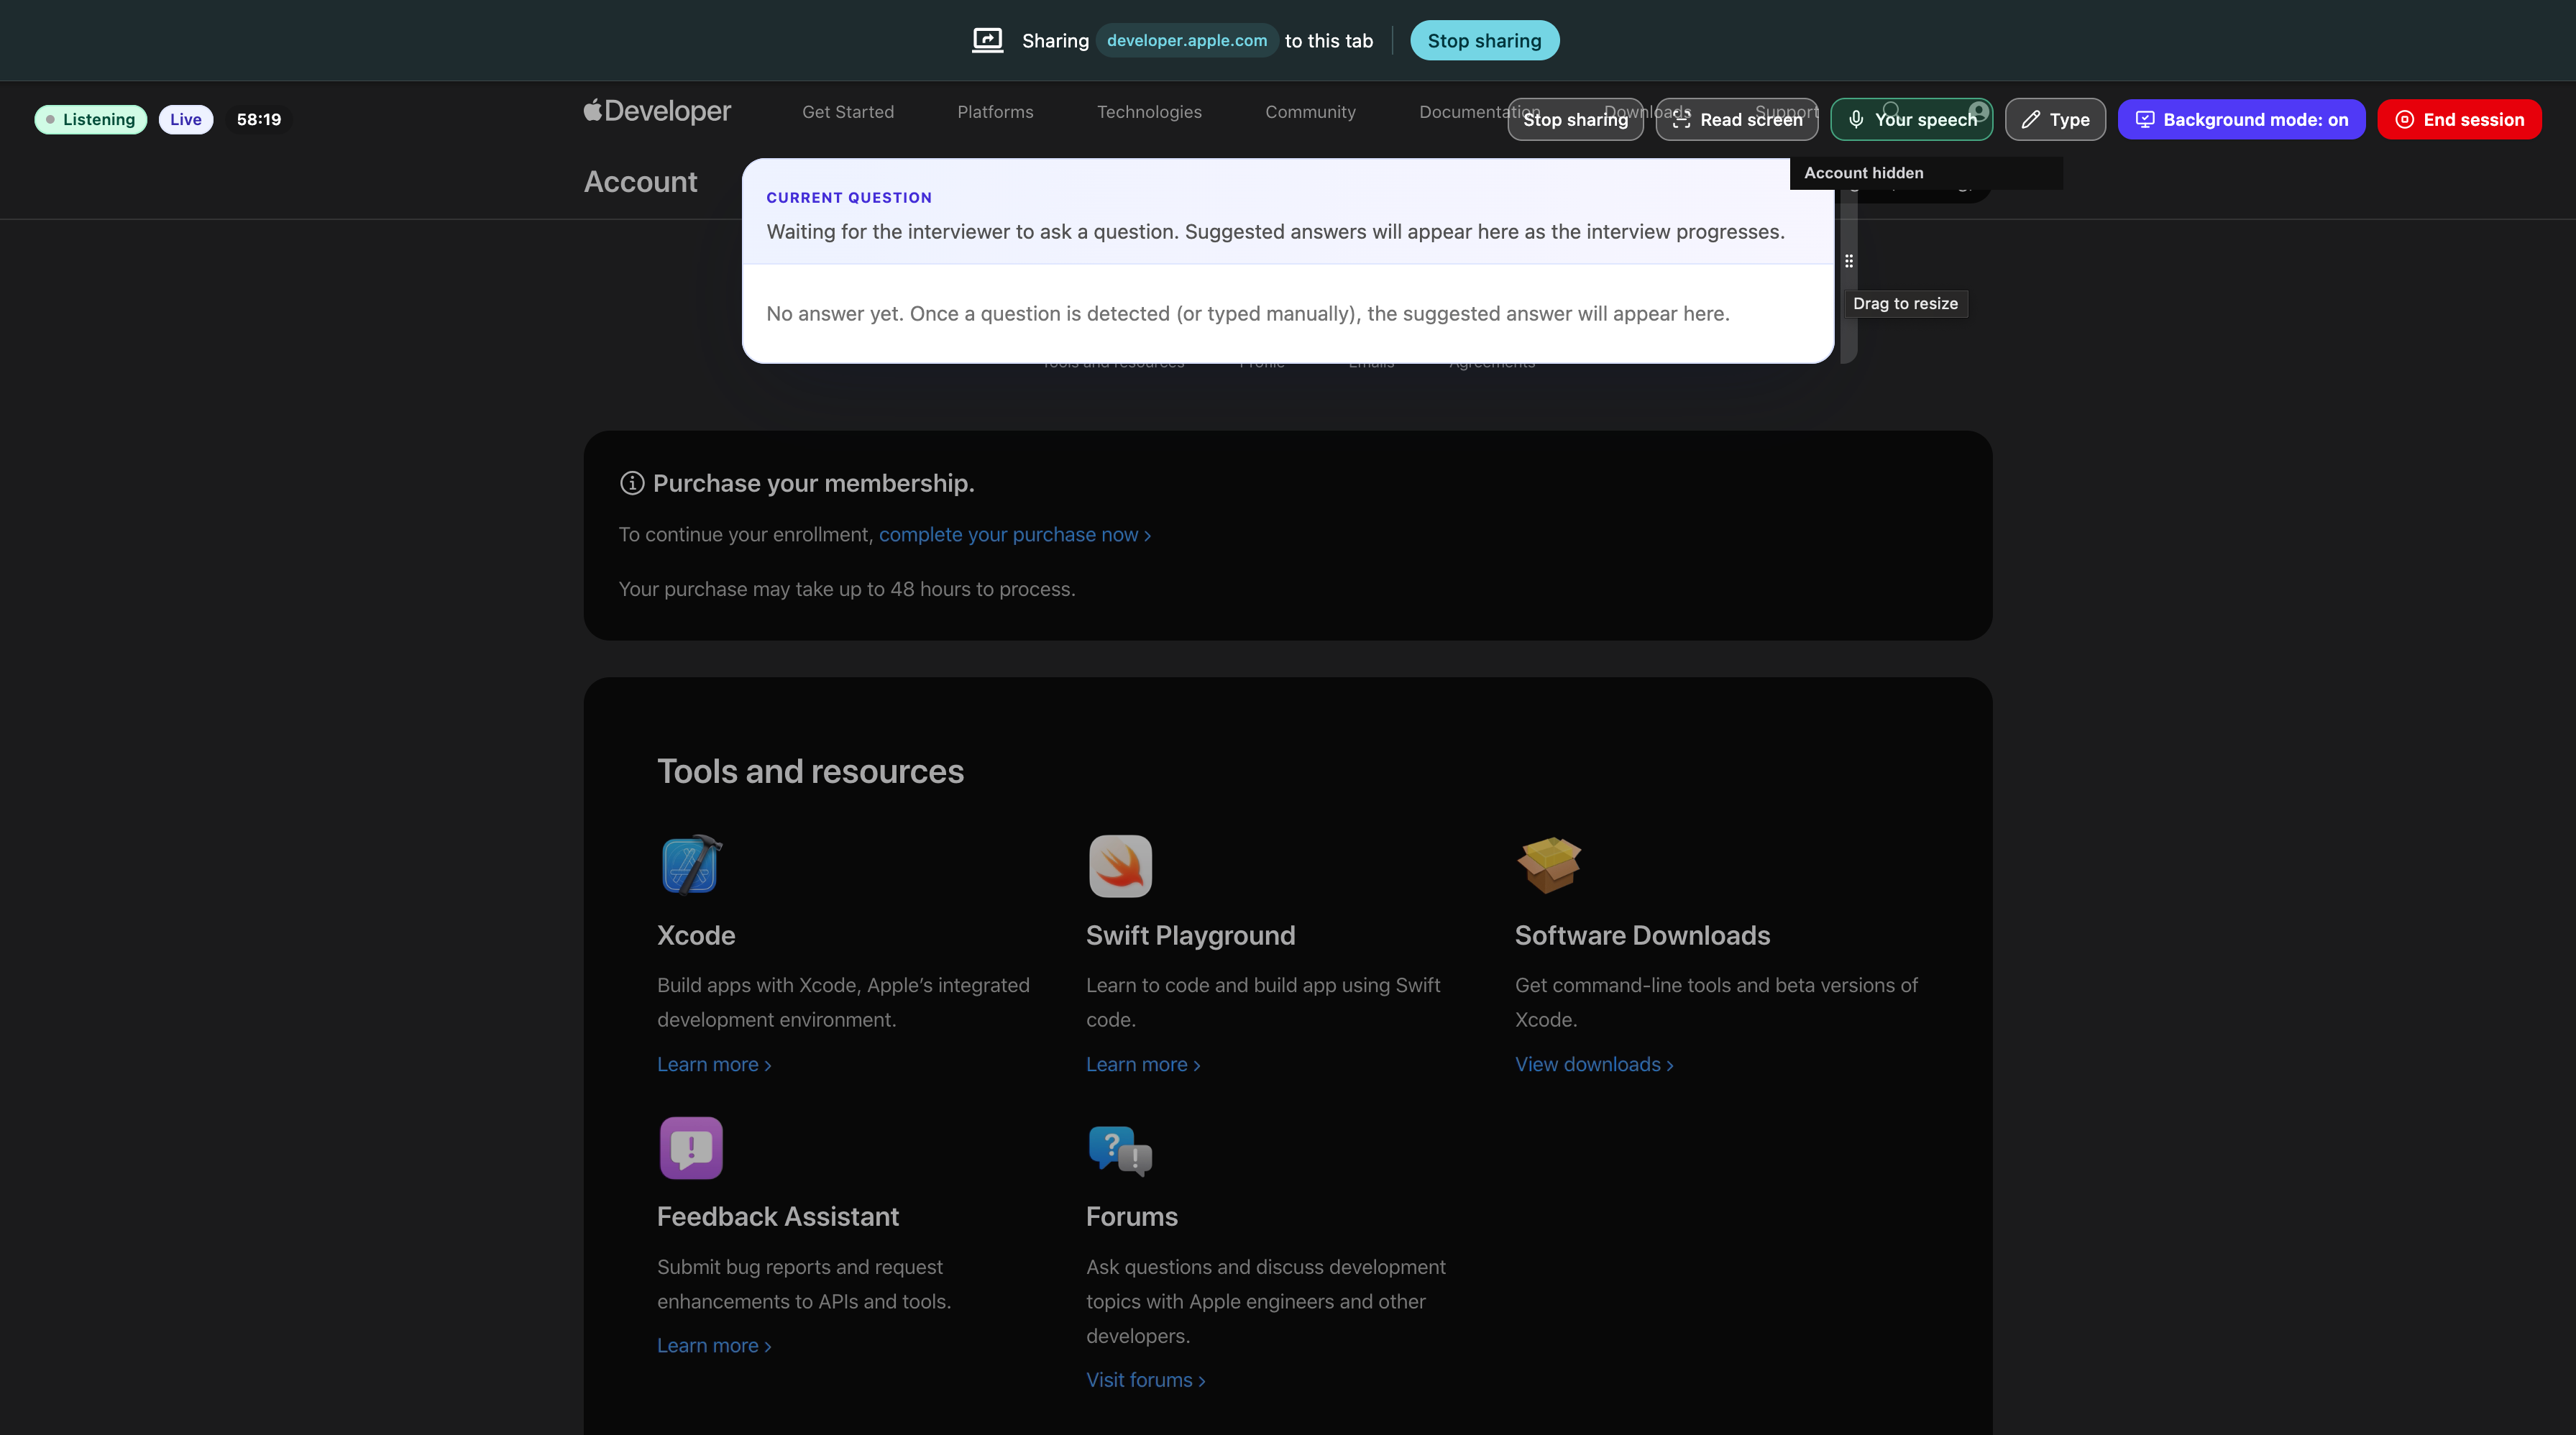
Step 7: Use the live overlay
When setup is complete, Voqra opens the live overlay.
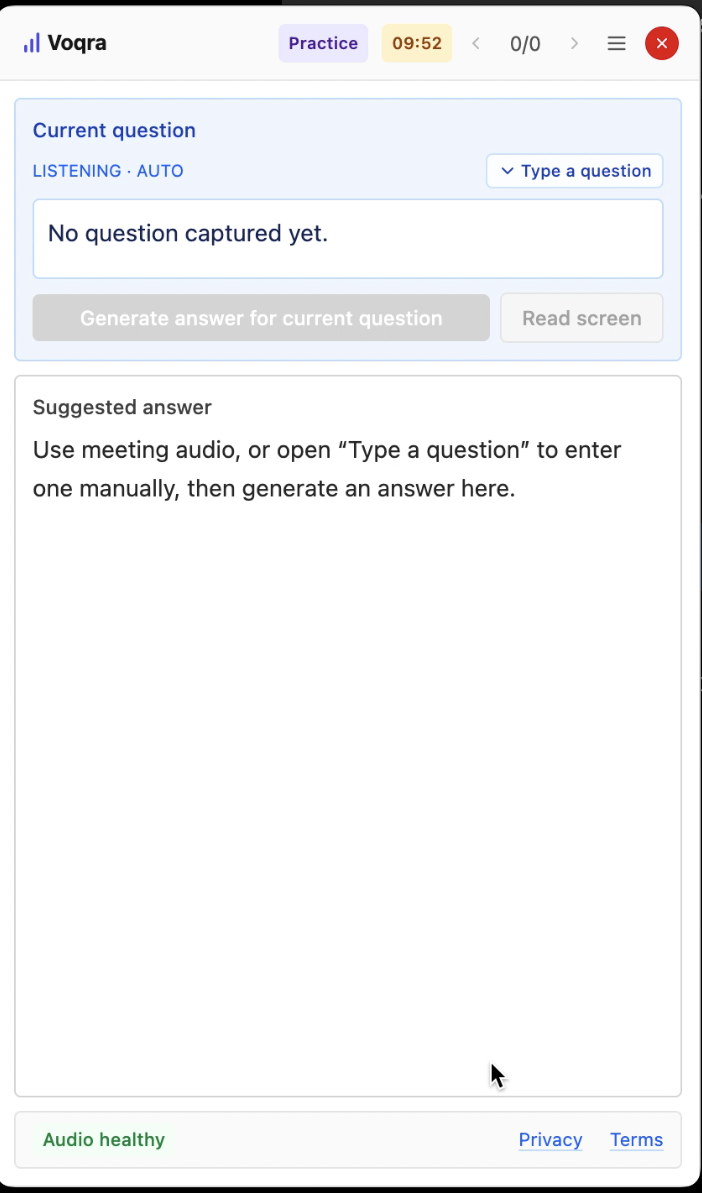
During the interview, use the overlay for:
- detected interviewer questions
- typed questions when you want to enter one manually
- suggested answer structure
- screen reads when the interviewer references shared content
- answer generation once a question is available
Do not read suggestions word for word. Use them as structure. The goal is to stay natural while getting help with organization, examples, and recovery.
Use the overlay calmly
When a question appears, read the main idea first. Then answer in your own words.
A practical pattern is:
- Start with a direct answer.
- Use one example.
- Explain your action.
- Close with the result or lesson.
If you lose your place, pause and restart cleanly:
“Let me answer that more clearly.”
That sounds more composed than forcing a tangled answer.
End the session and review later
When the interview is over, end the session from the overlay. Then use the web app History page to review questions and answers later.
Review is useful because it helps you prepare for the next round. Look for:
- questions that appeared more than once
- answers that were too long
- examples that worked well
- areas where you needed stronger evidence
Desktop web guide
Desktop web is useful when you are using Voqra from a laptop browser. It gives you access to sign-in, setup, browser-based live sessions, history, billing, and the desktop app download.
Step 1: Open Voqra in your browser
Open Voqra in a desktop browser and choose Sign in to continue.
The web app is the right starting point when you want to set up a session, review history, manage billing, or download the desktop app.
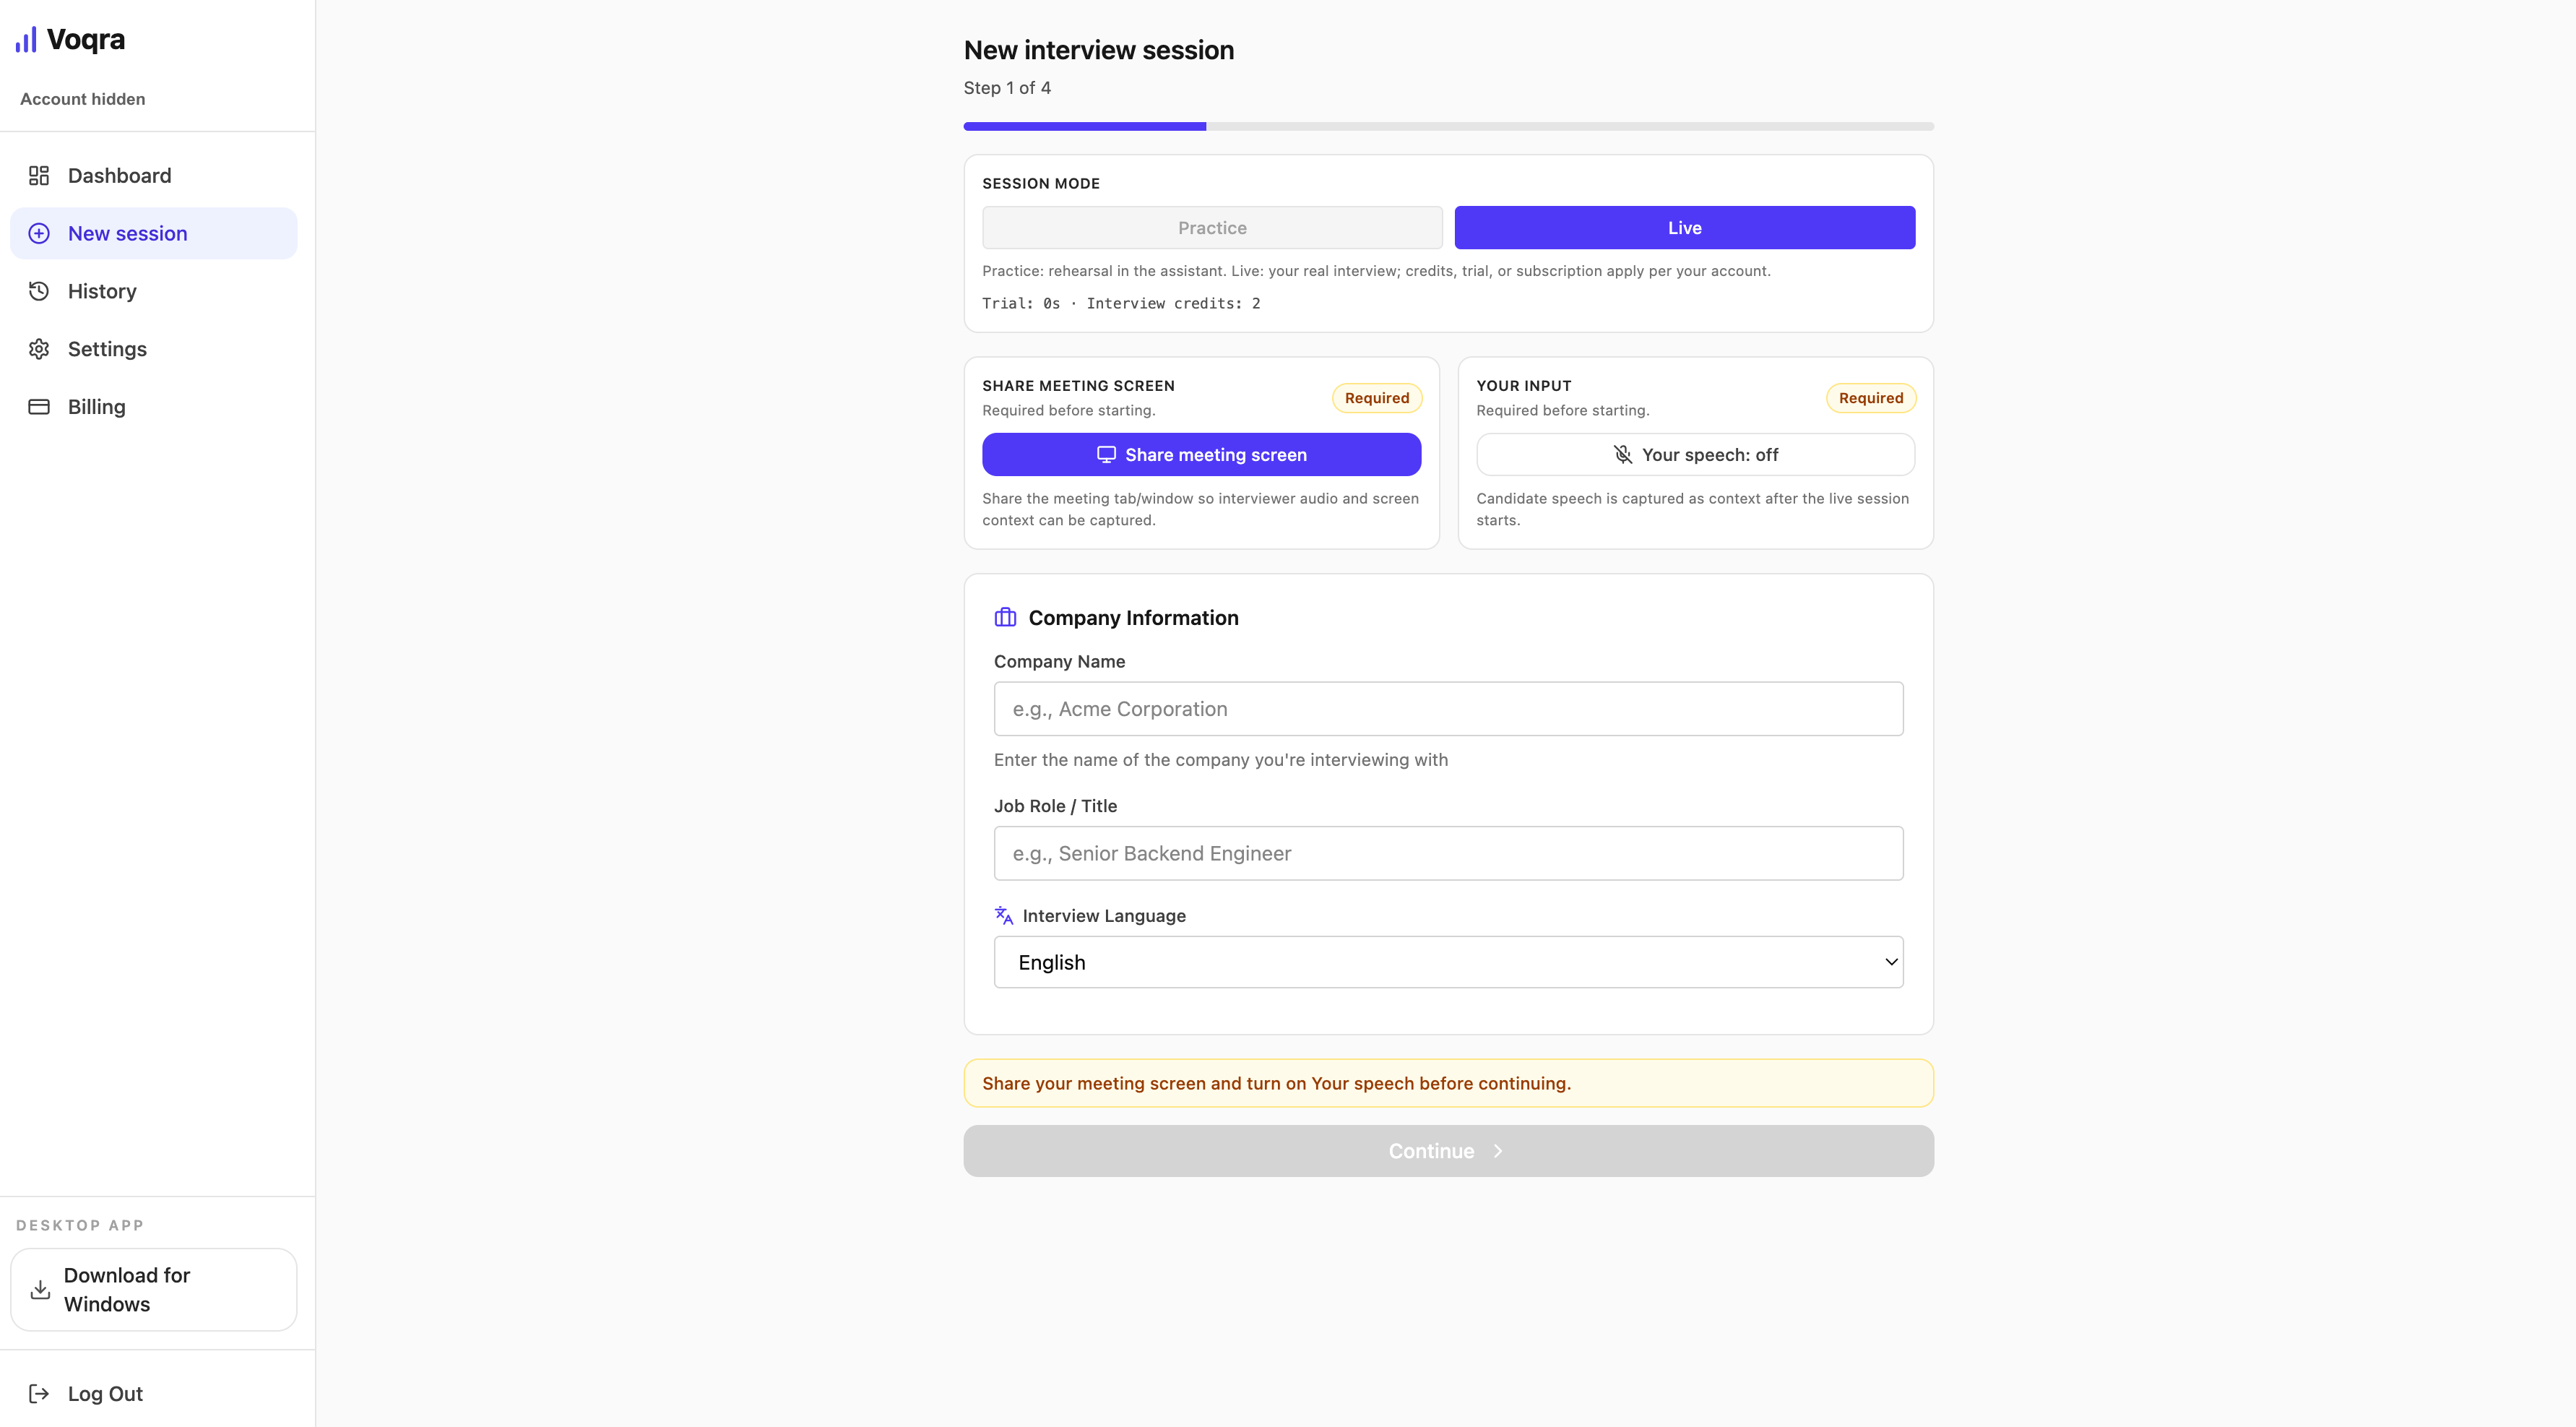
Step 2: Start a new session
Choose New session from the sidebar. Before you can continue, Voqra asks for the meeting screen, your speech input, company name, role, and interview language.
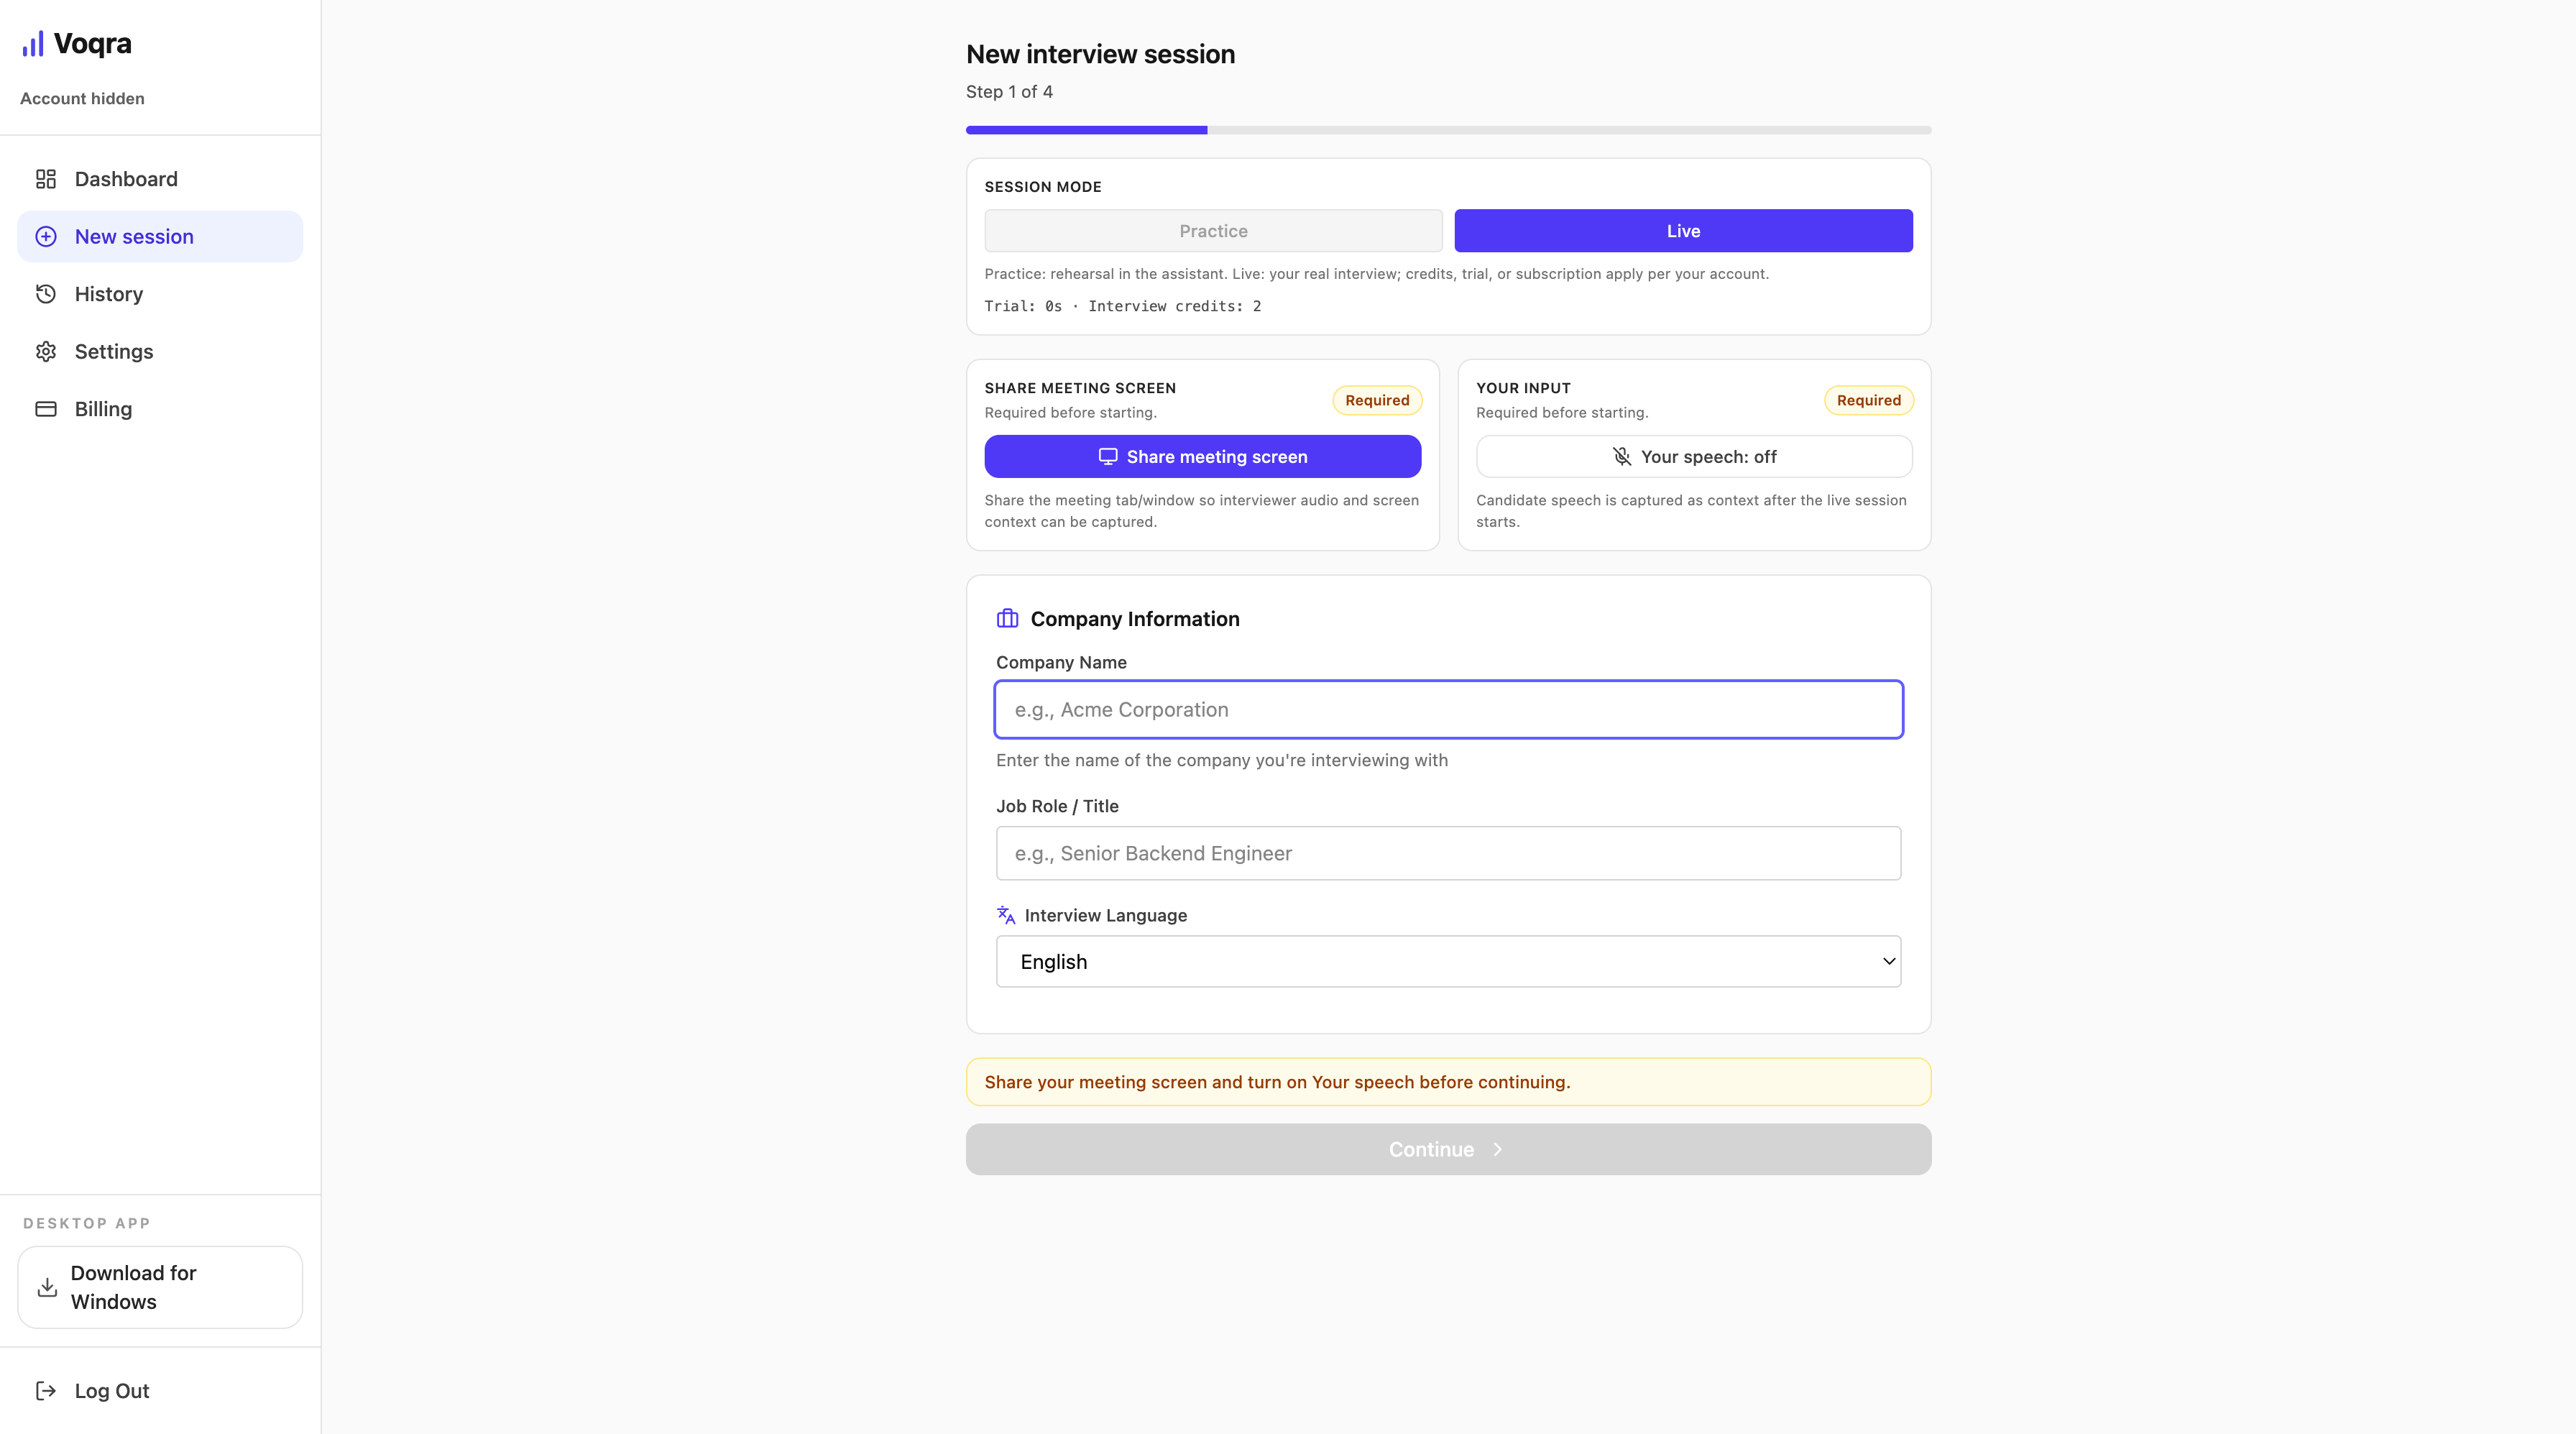
Use Practice when you are rehearsing. Use Live when you are preparing for the actual interview.
Step 3: Share the meeting screen and turn on input
Select the meeting tab or window so Voqra can use the shared screen as context. Turn on your speech input before continuing.
The Continue button stays disabled until the required screen and speech inputs are ready.
Step 4: Add company and role details
After sharing and speech input are ready, add the company name, job role, and interview language.
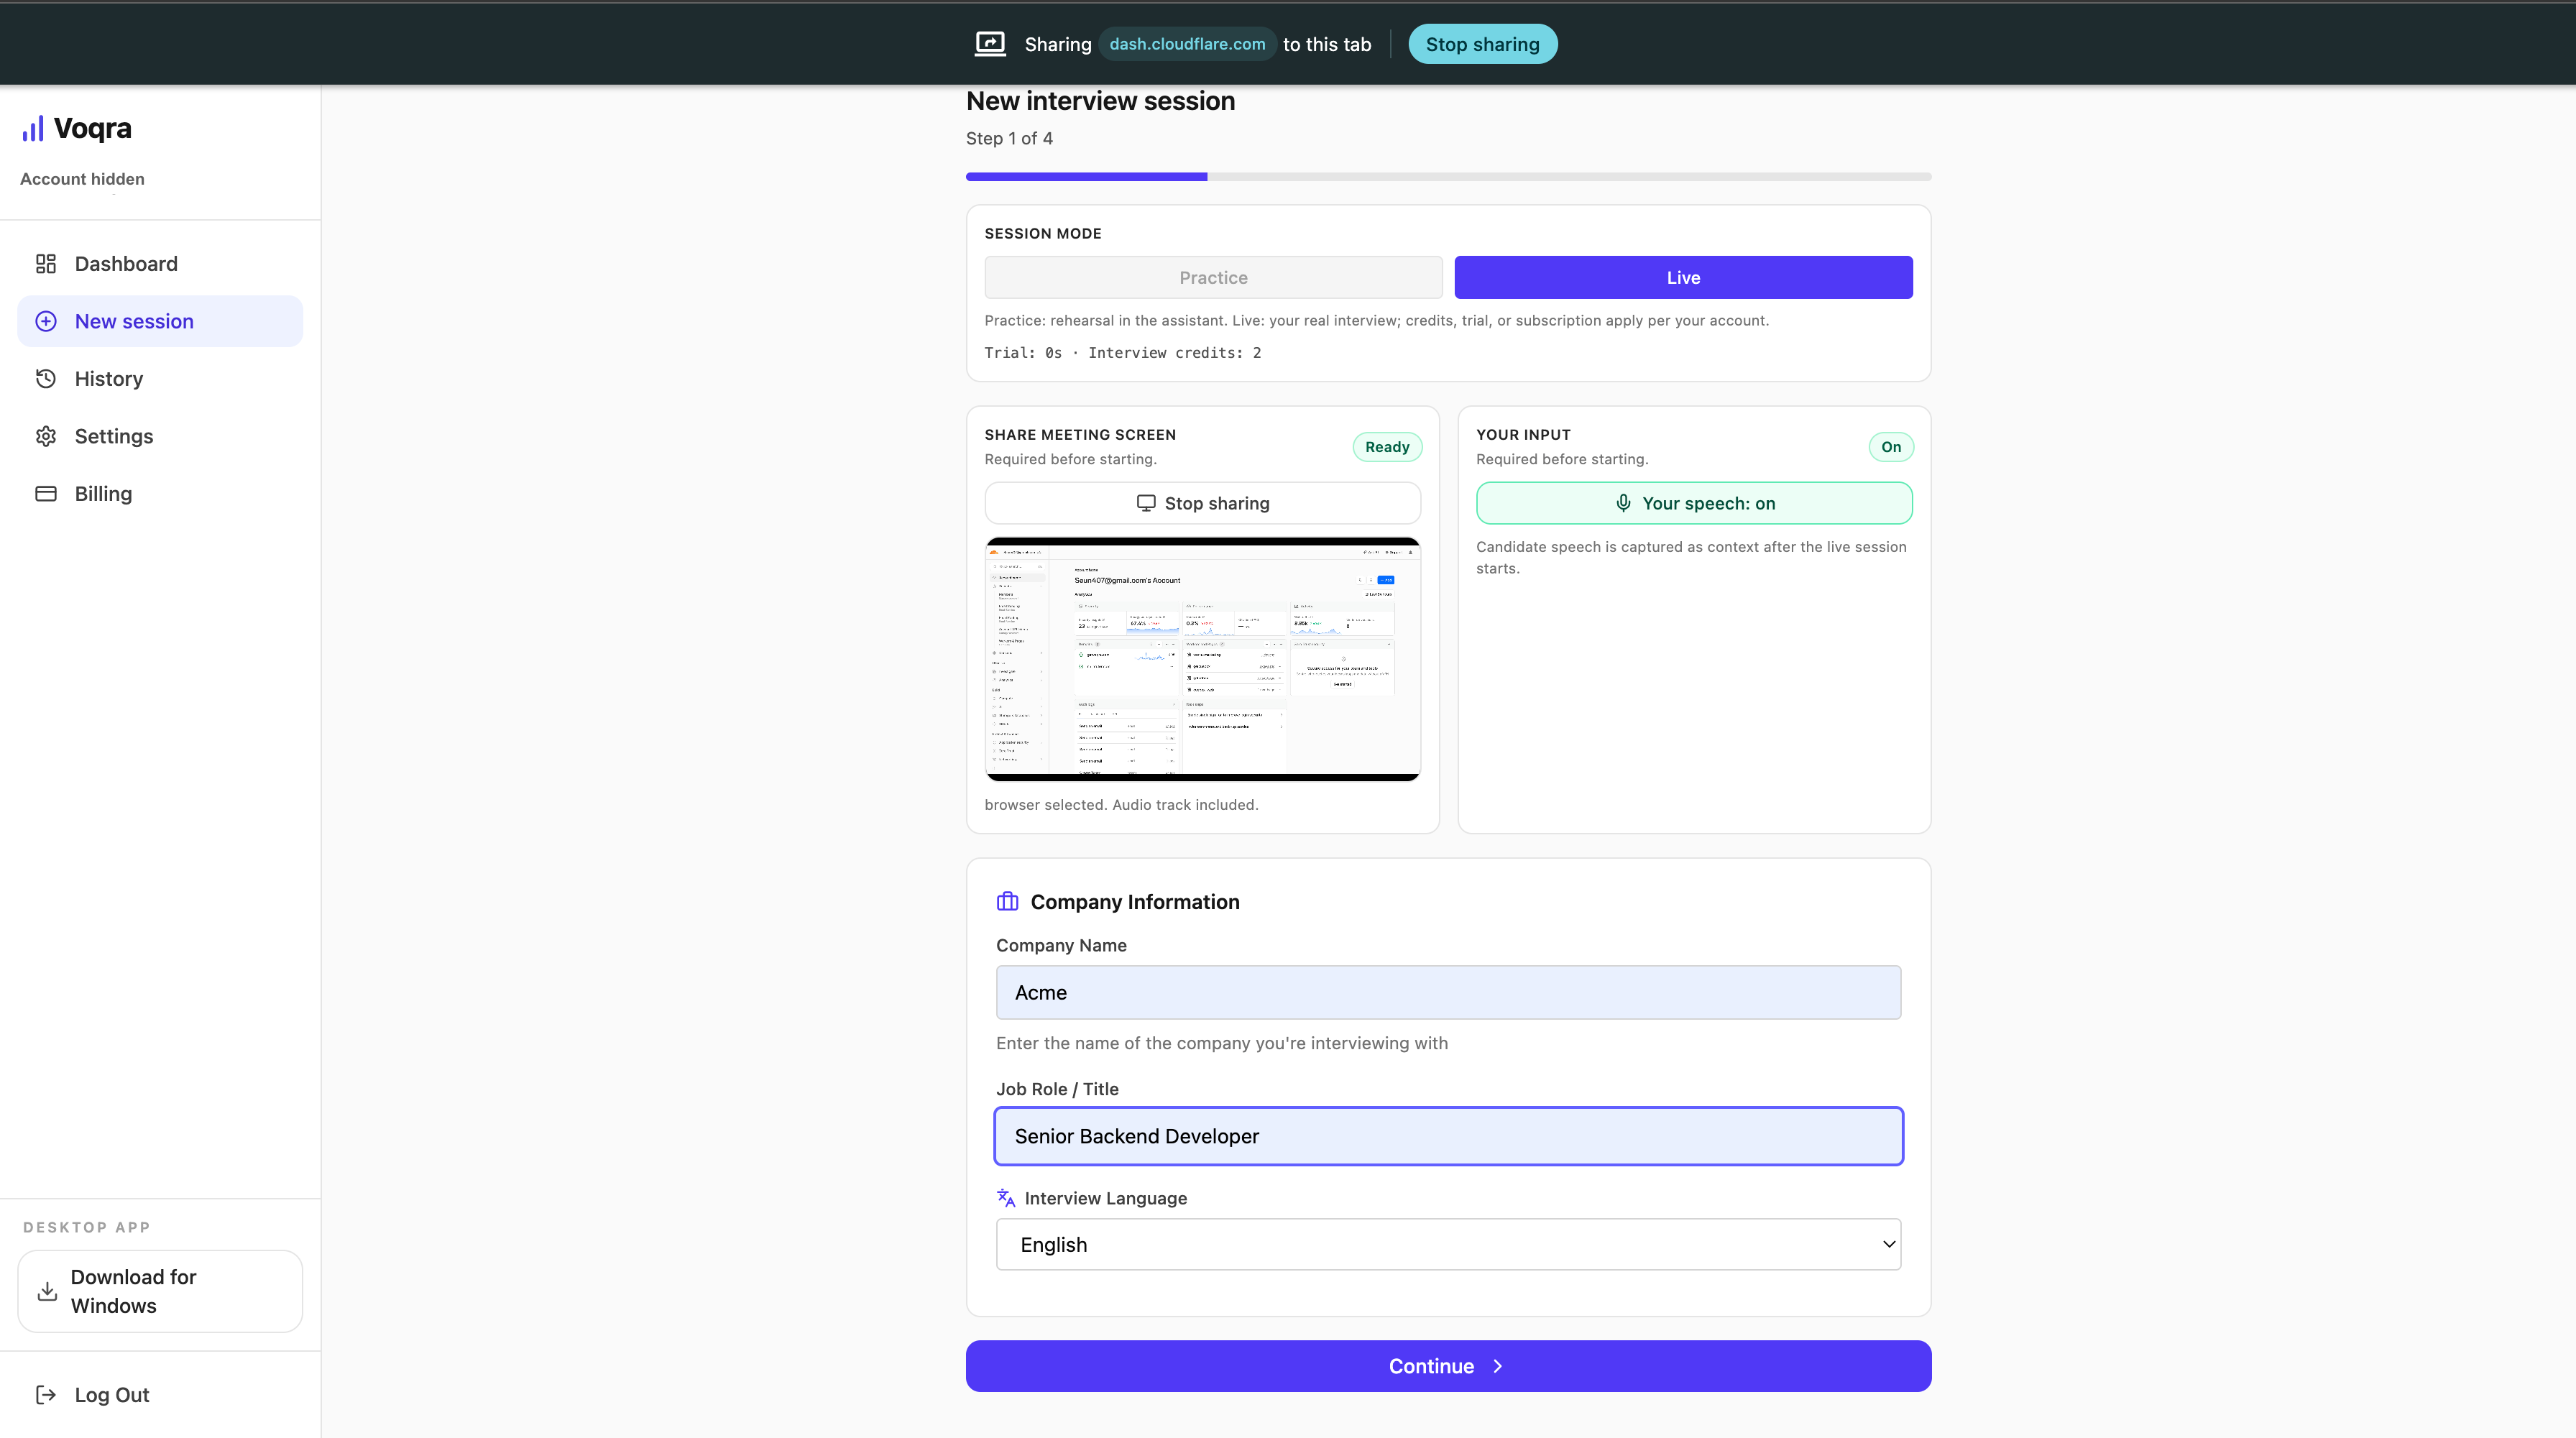
The Continue button becomes available after the required setup fields are ready.
Step 5: Upload your resume
Upload the resume you want Voqra to use for answer context.
Your resume helps Voqra connect answers to your real work history, projects, and experience.
Step 6: Paste the job description
Paste the full job description into the setup form.
Include the responsibilities, required skills, and any team or product context from the posting. The more specific the role context is, the more relevant the answer suggestions can be.
Step 7: Add optional notes and start
Use the notes step for talking points you want to remember, then choose Start Interview.
Good notes include:
- projects you want to mention
- metrics you want to remember
- questions for the interviewer
- examples you want to avoid forgetting
At this point, your session has the company, role, resume, job description, optional notes, meeting screen, and speech input context.
Step 8: Use the live session view
After setup, Voqra opens the active session page.
In the live session view, you can:
- start or stop microphone input
- share or stop sharing display context
- read the screen manually
- type a question
- generate or review answer suggestions
- end the session when the interview is done
Use desktop web when you want a full browser workspace. Use the desktop app when you want the most focused live interview experience.
Step 9: Use background mode when you need the page behind it
Turn on background mode when you want Voqra visible over the shared browser page.
Keep the answer panel where you can read it quickly without blocking the page you are sharing.
Step 10: Review interview history
After the session, go to History. Use it to review what happened and prepare for the next interview.
You can look for:
- which question types came up
- where you sounded strongest
- where you rambled or lost structure
- which stories you should reuse or improve
Keep answers short enough to use
During the interview, Voqra may generate more structure than you need to say out loud. Pick the parts that help you answer clearly.
For most live answers:
- use one example
- avoid unnecessary background
- keep the first sentence direct
- end with the result, lesson, or next step
If the interviewer asks a follow-up, use the suggestion as context, not a script.
Mobile web guide
Mobile web is useful when you are away from your laptop. It supports setup, microphone input, typed questions, lightweight live sessions, and review. For meeting screen share and full interviewer audio capture, use desktop web or the desktop app.
Step 1: Open Voqra on your phone
Open Voqra in your mobile browser and choose Sign in to continue.
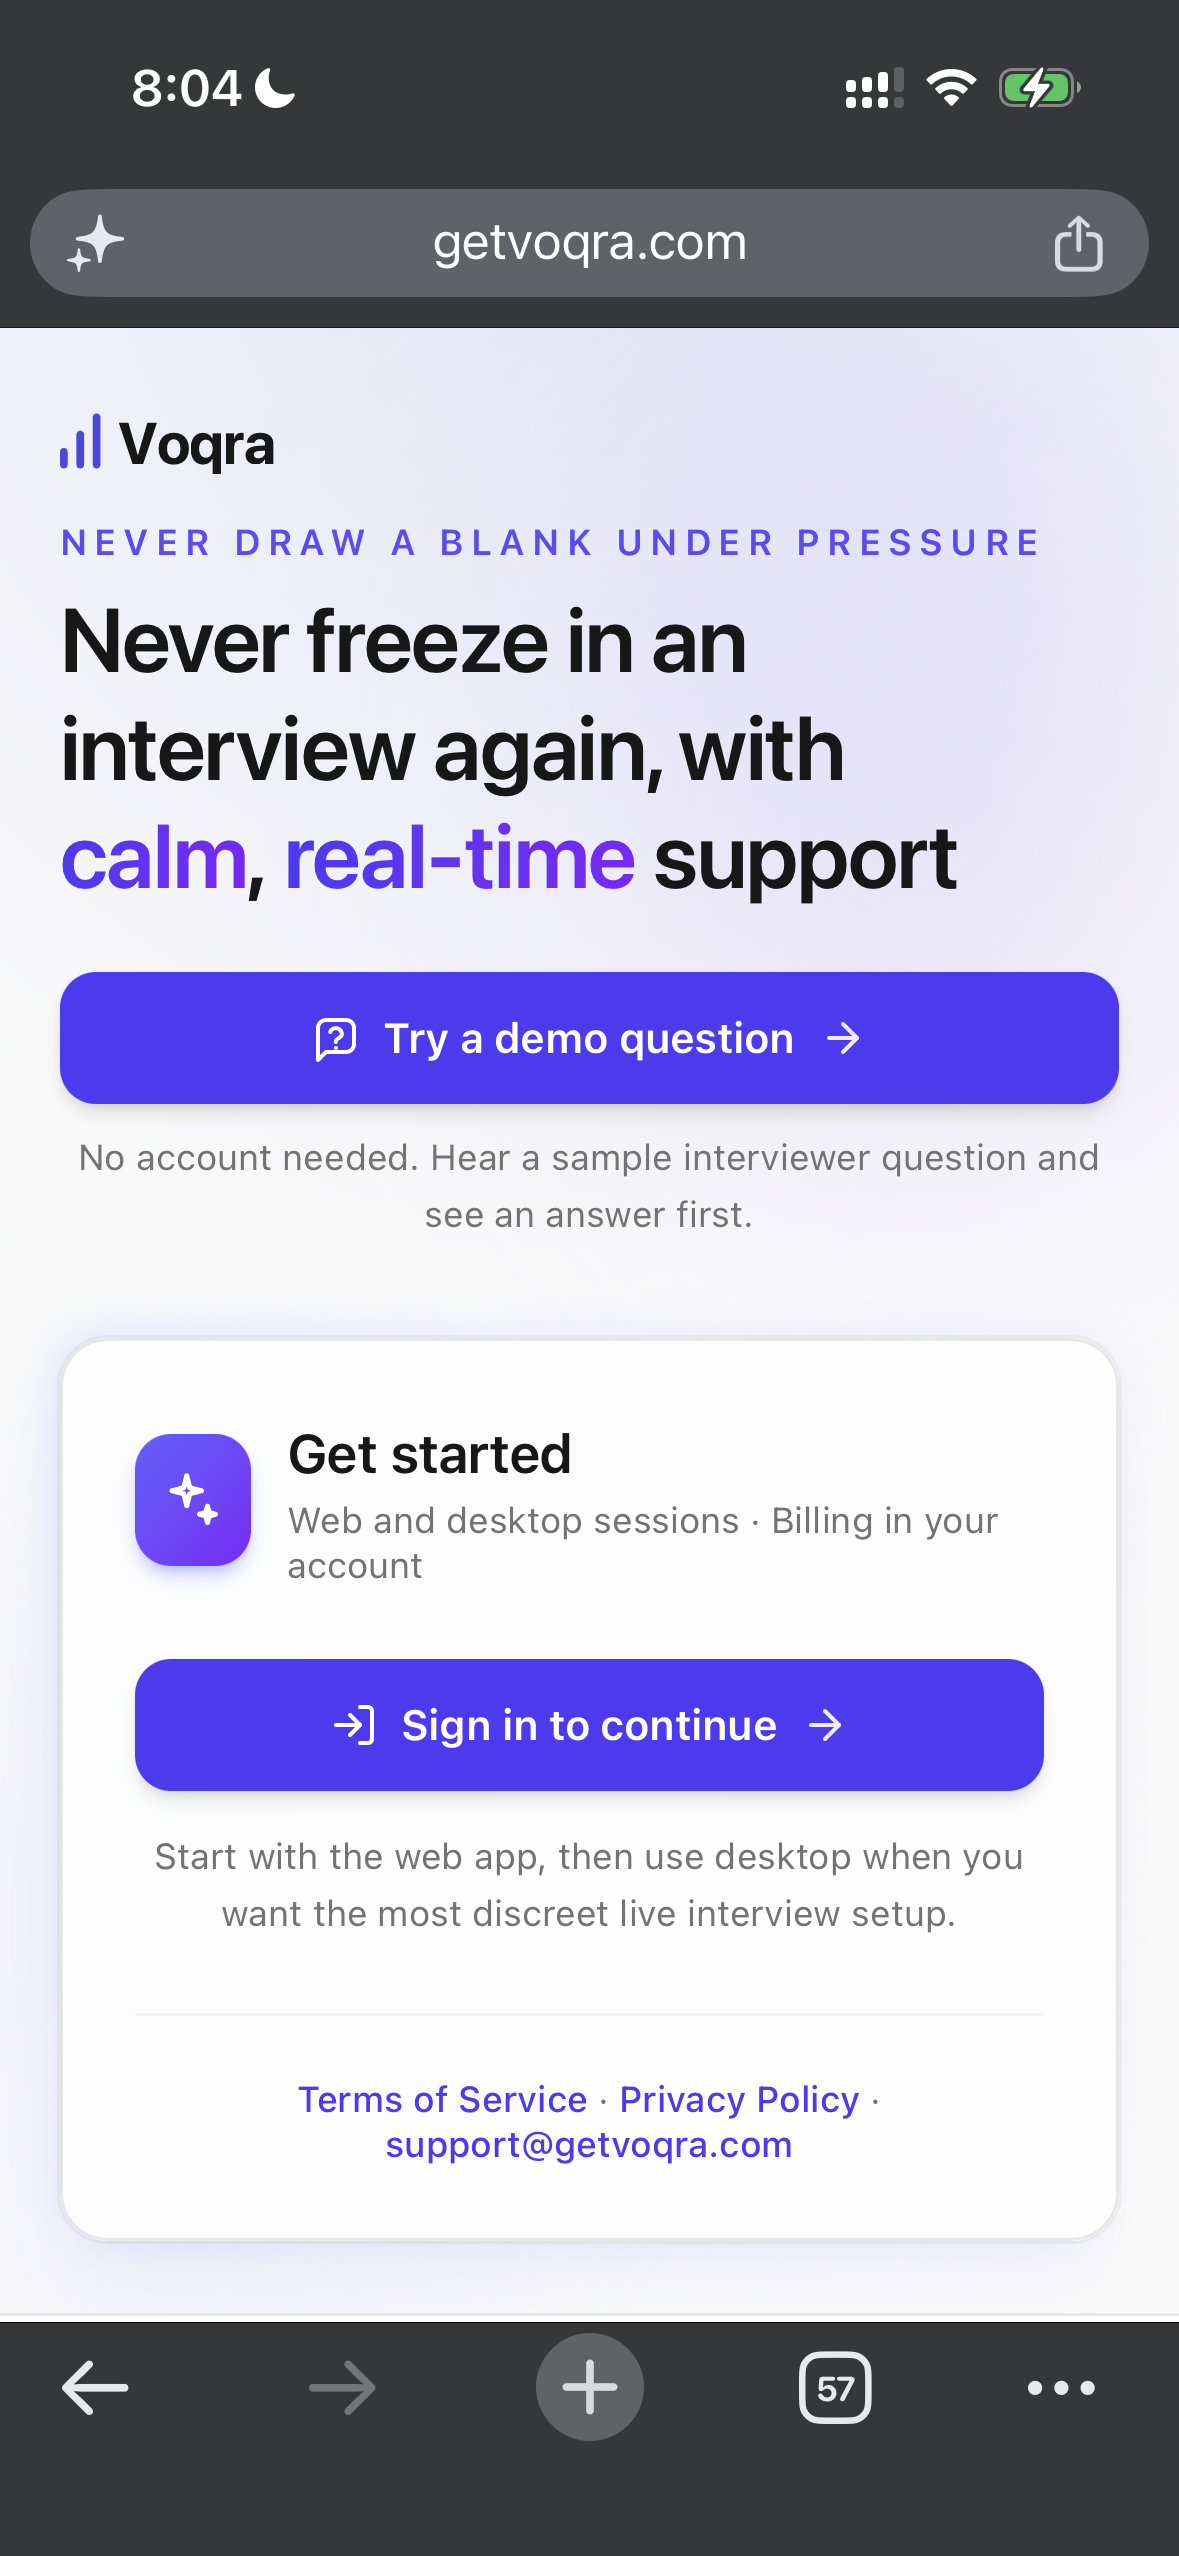
Mobile web is useful when you want to prepare context before switching to your laptop or when you want quick practice away from your main setup.
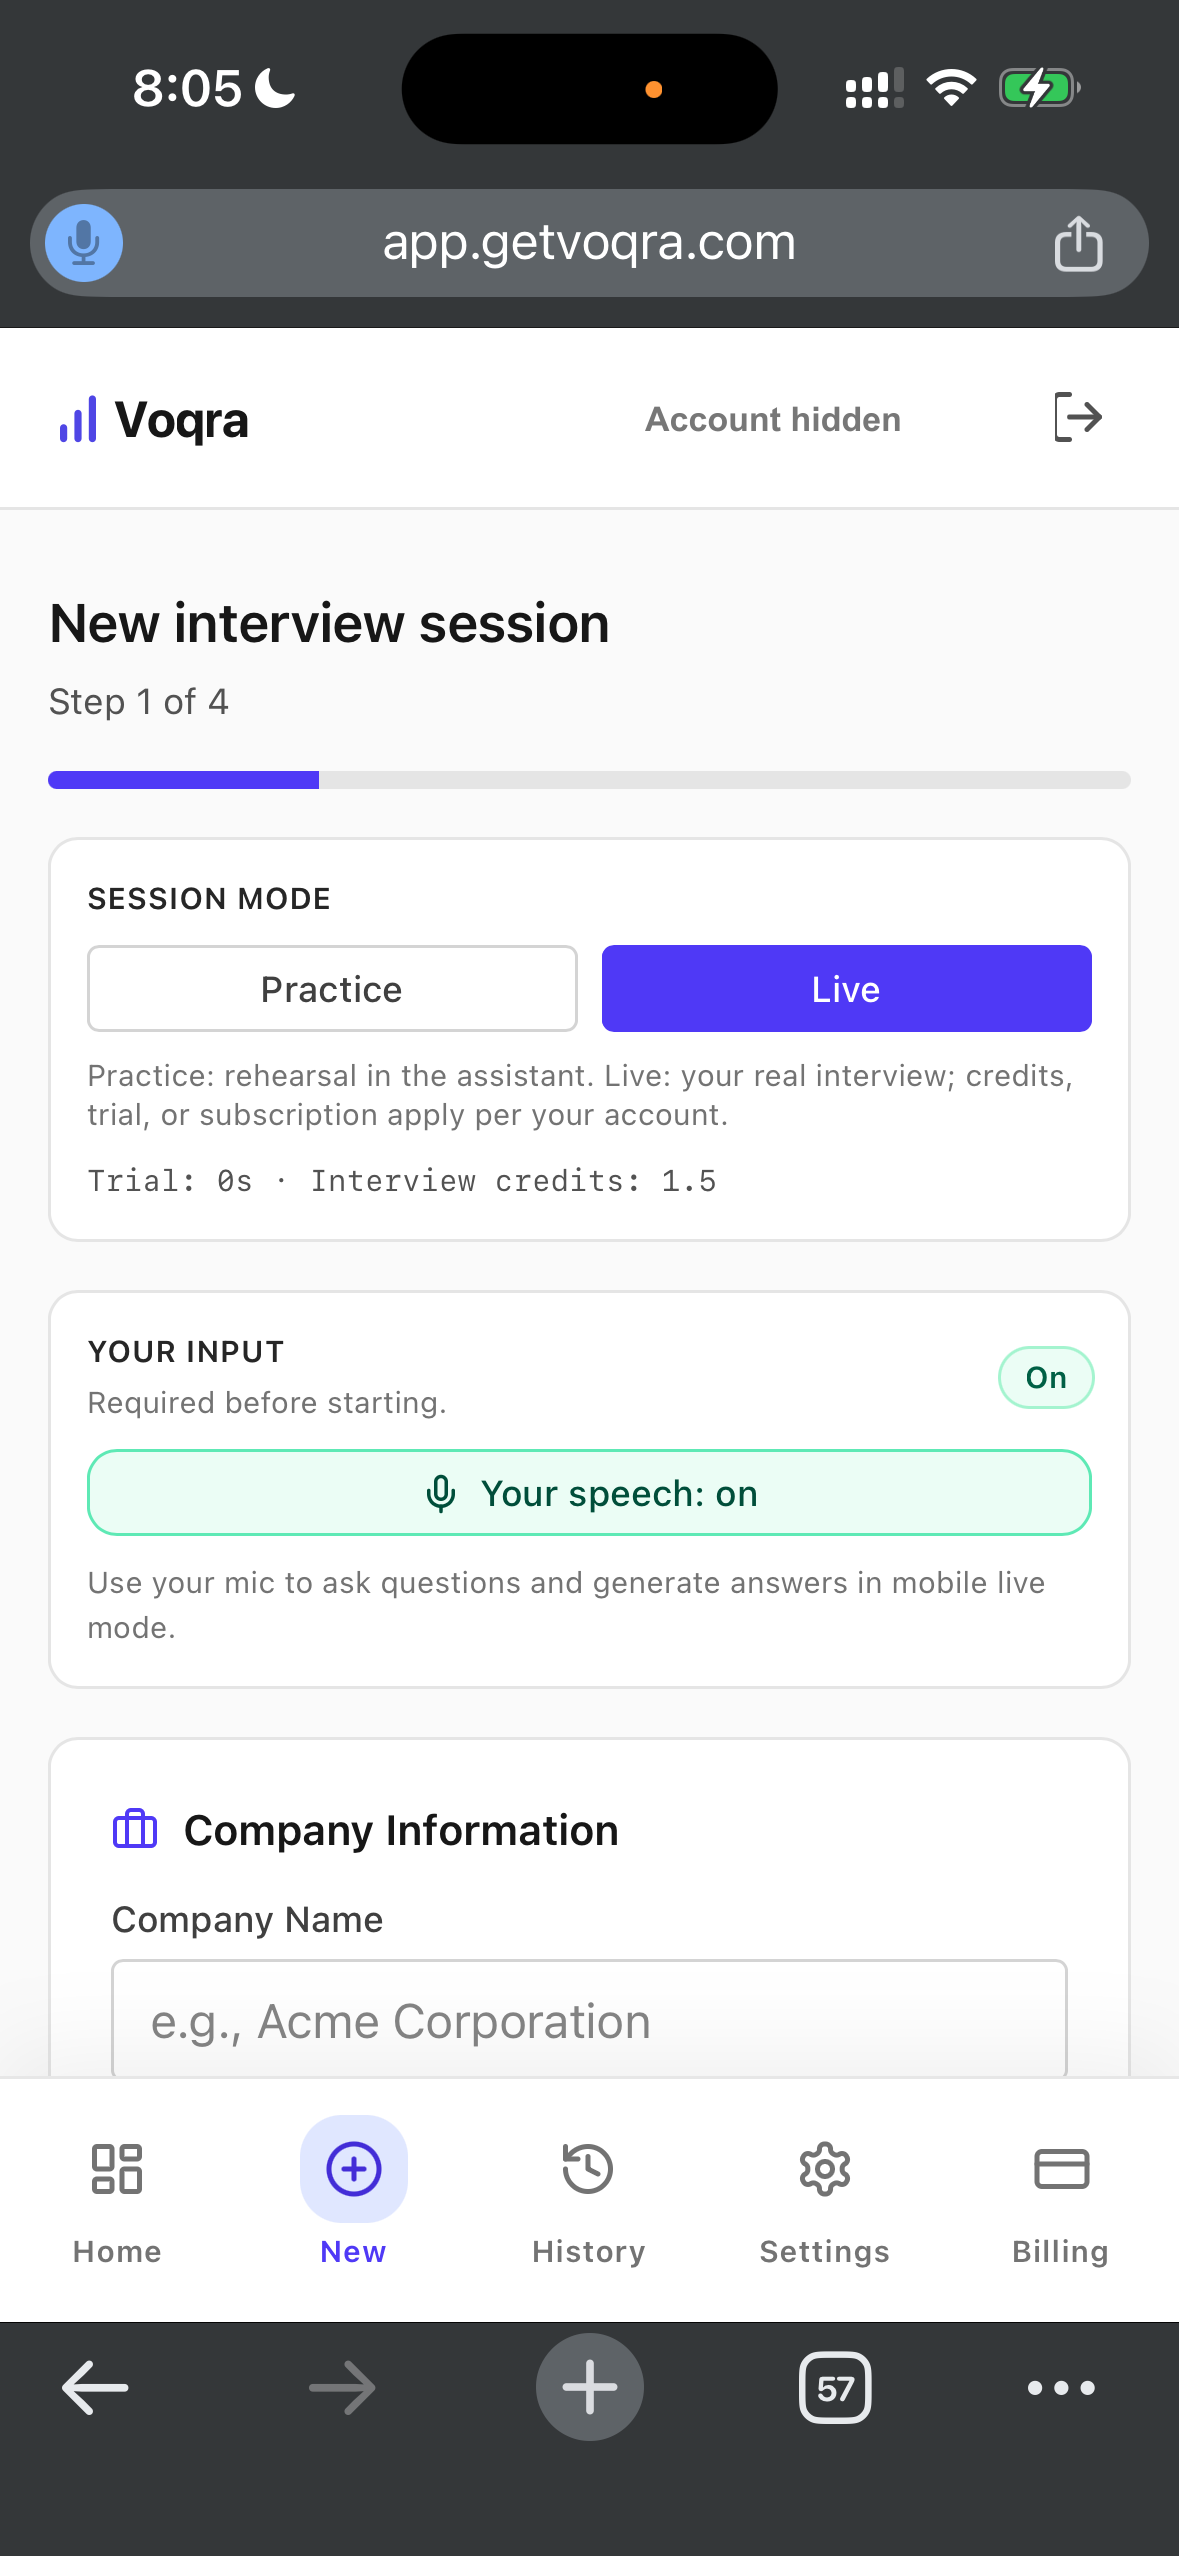
Step 2: Start a mobile session
Open New and choose the session mode. Mobile live mode asks for speech input before you start.
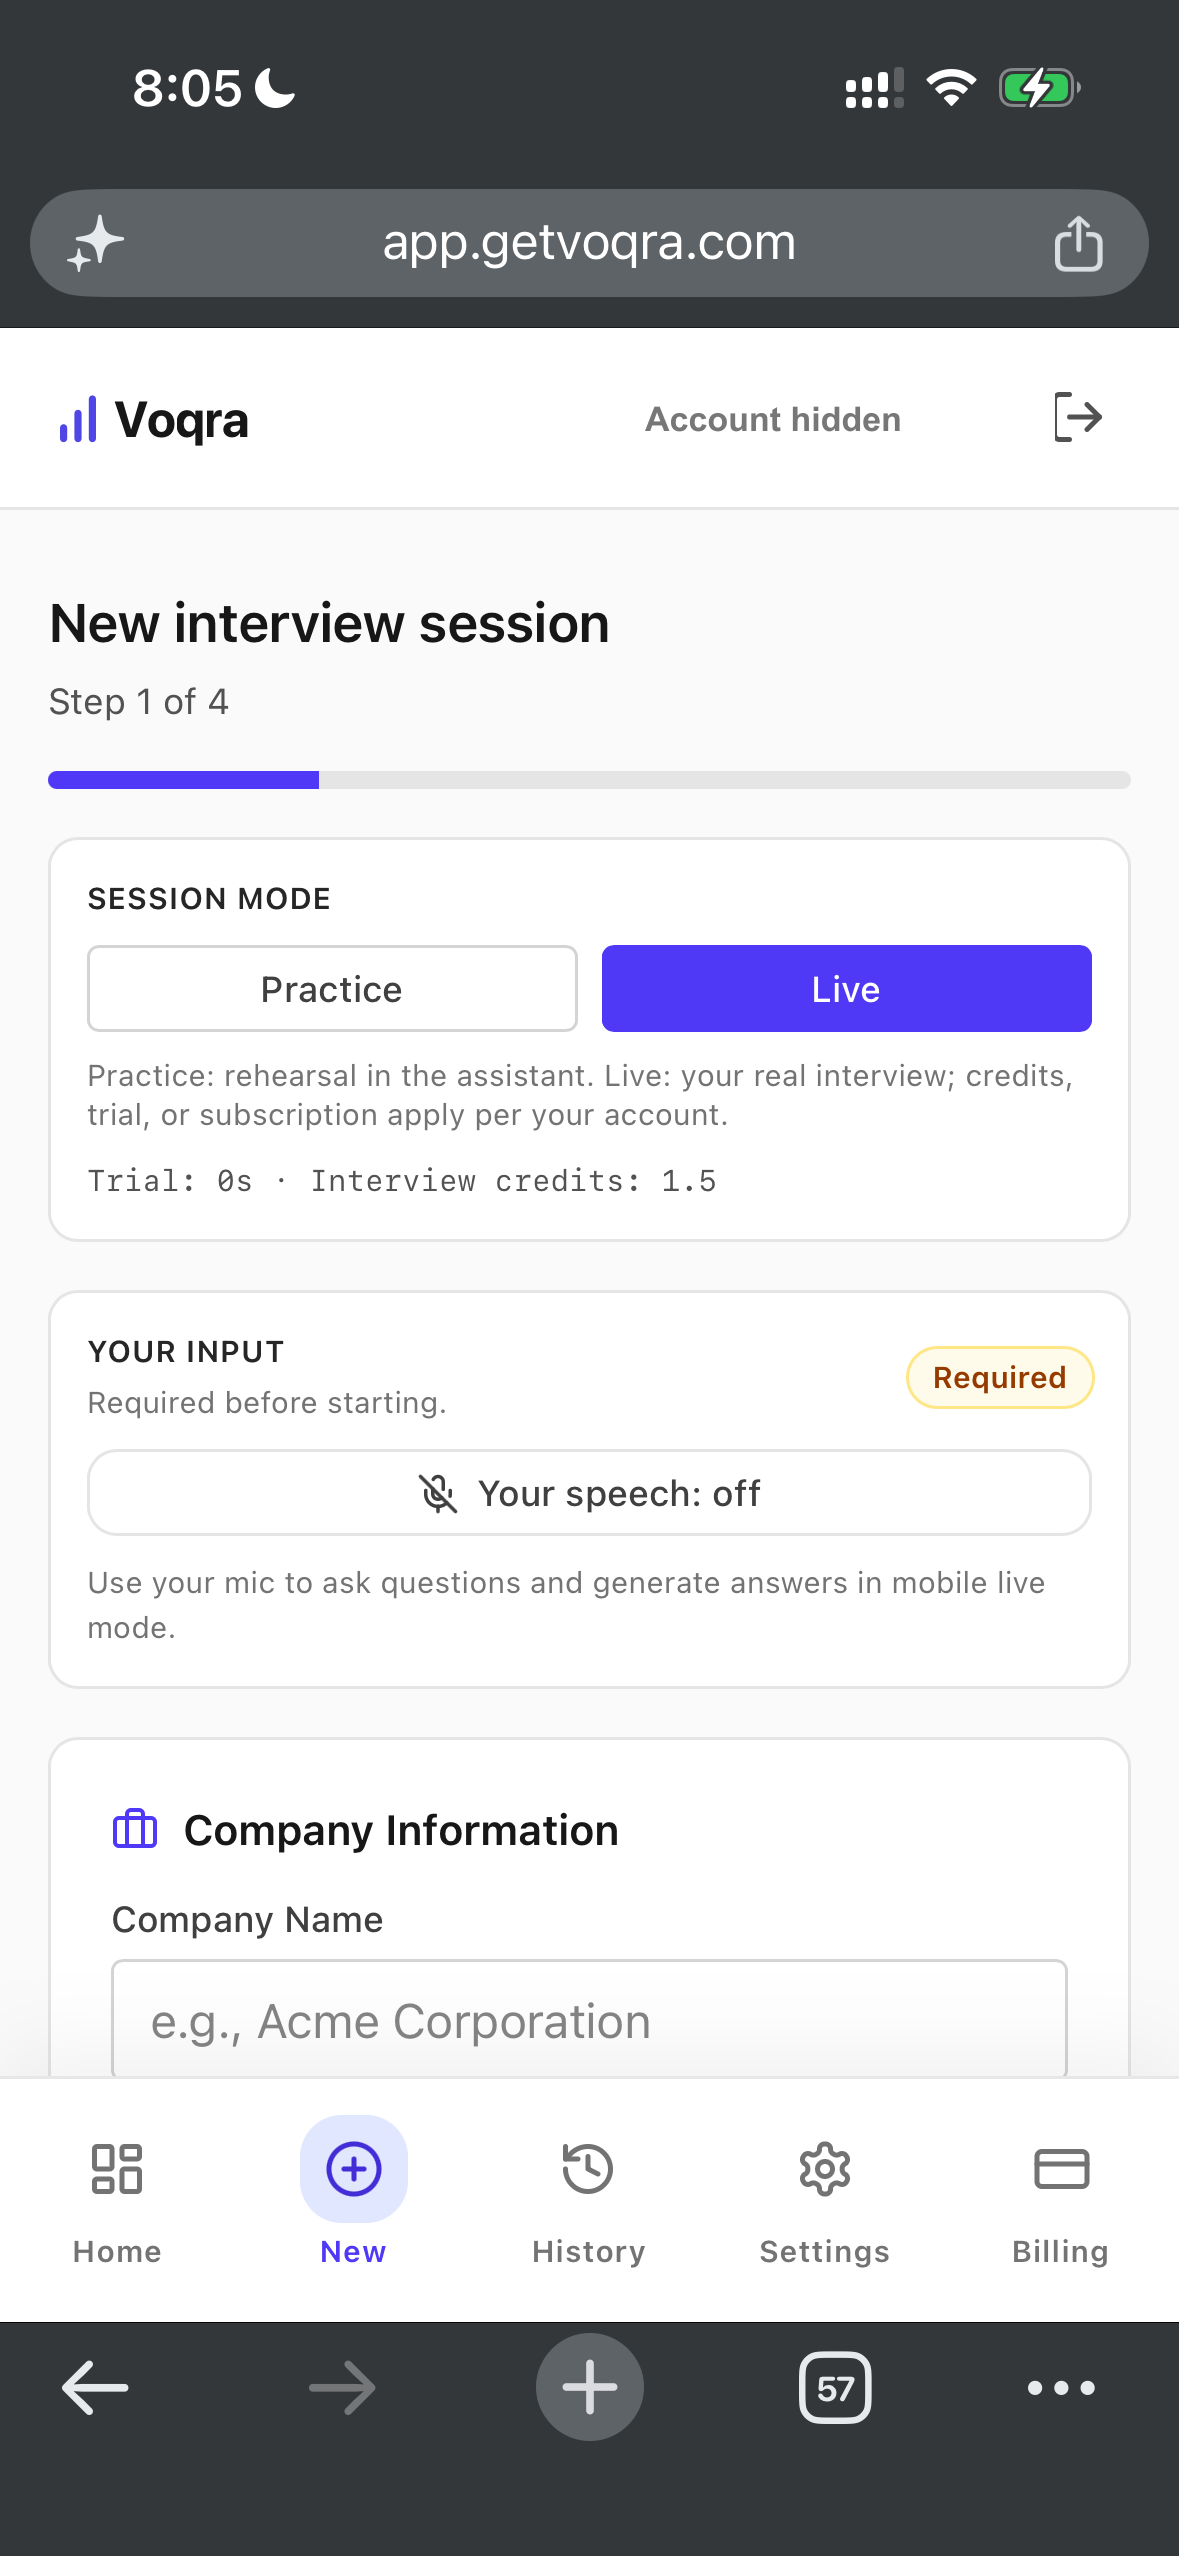
Use Practice when you are rehearsing. Use Live when you want the session timer and live answer flow.
Step 3: Turn on speech input
Enable microphone input so Voqra can use your spoken questions or practice answers.
Mobile supports microphone and typed questions. Meeting screen share and interviewer audio capture are available on desktop web and in the desktop app.
Step 4: Add company and role details
Scroll to Company Information and add the company name, role, and interview language.
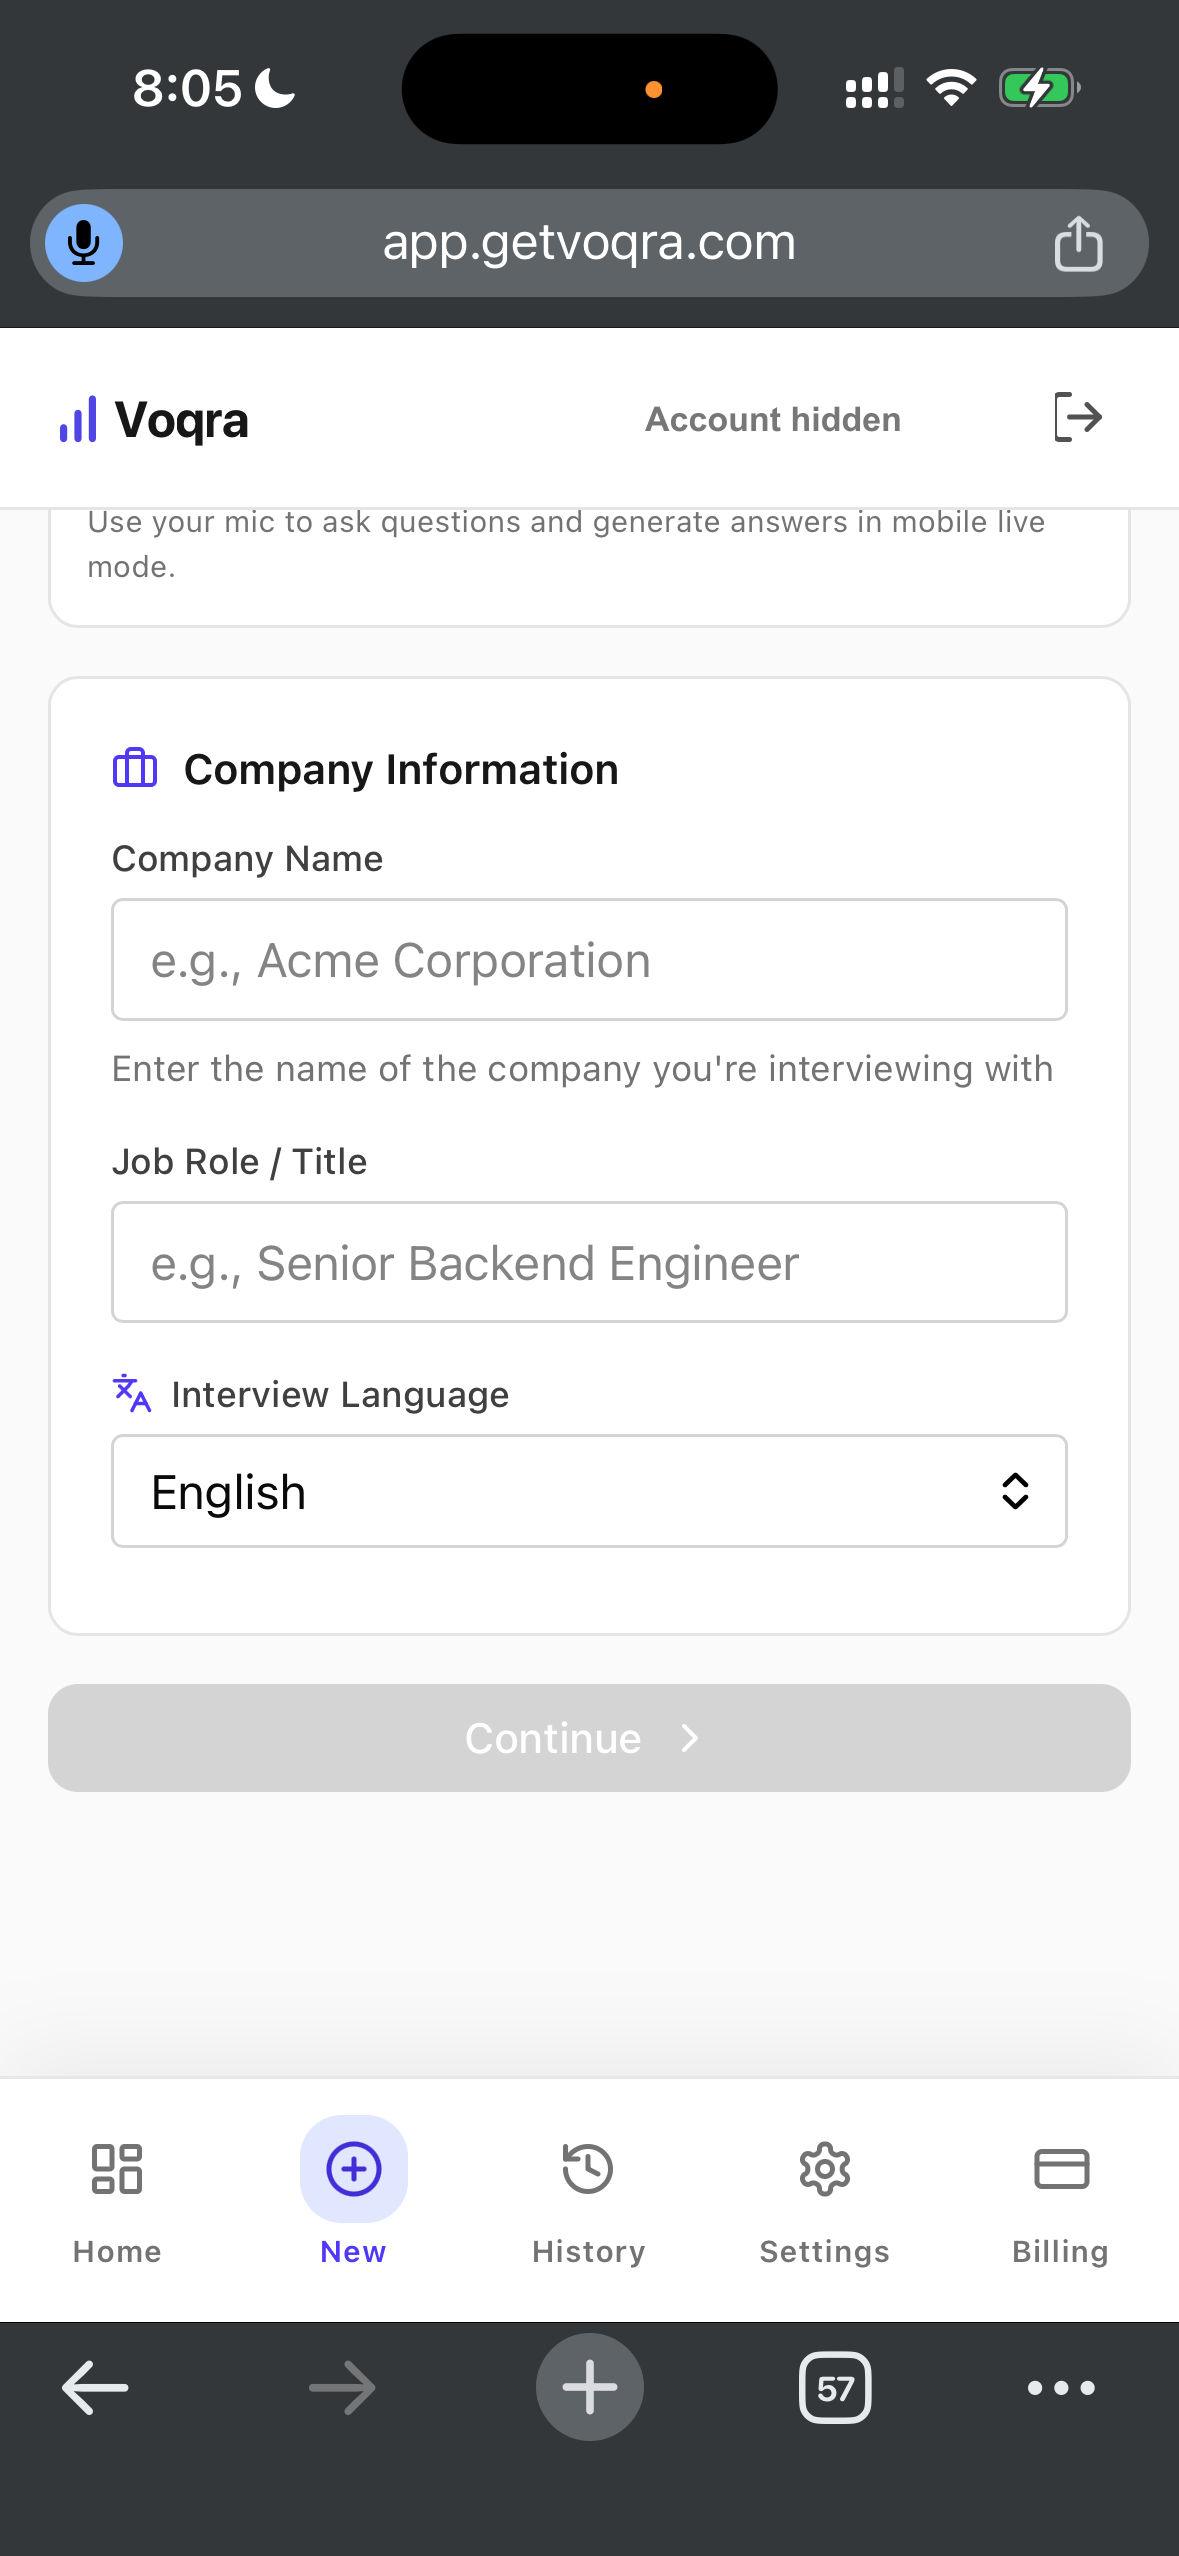
This context helps keep answer suggestions specific to the role you are preparing for.
Step 5: Upload your resume
Upload the resume you want Voqra to use for answer context.
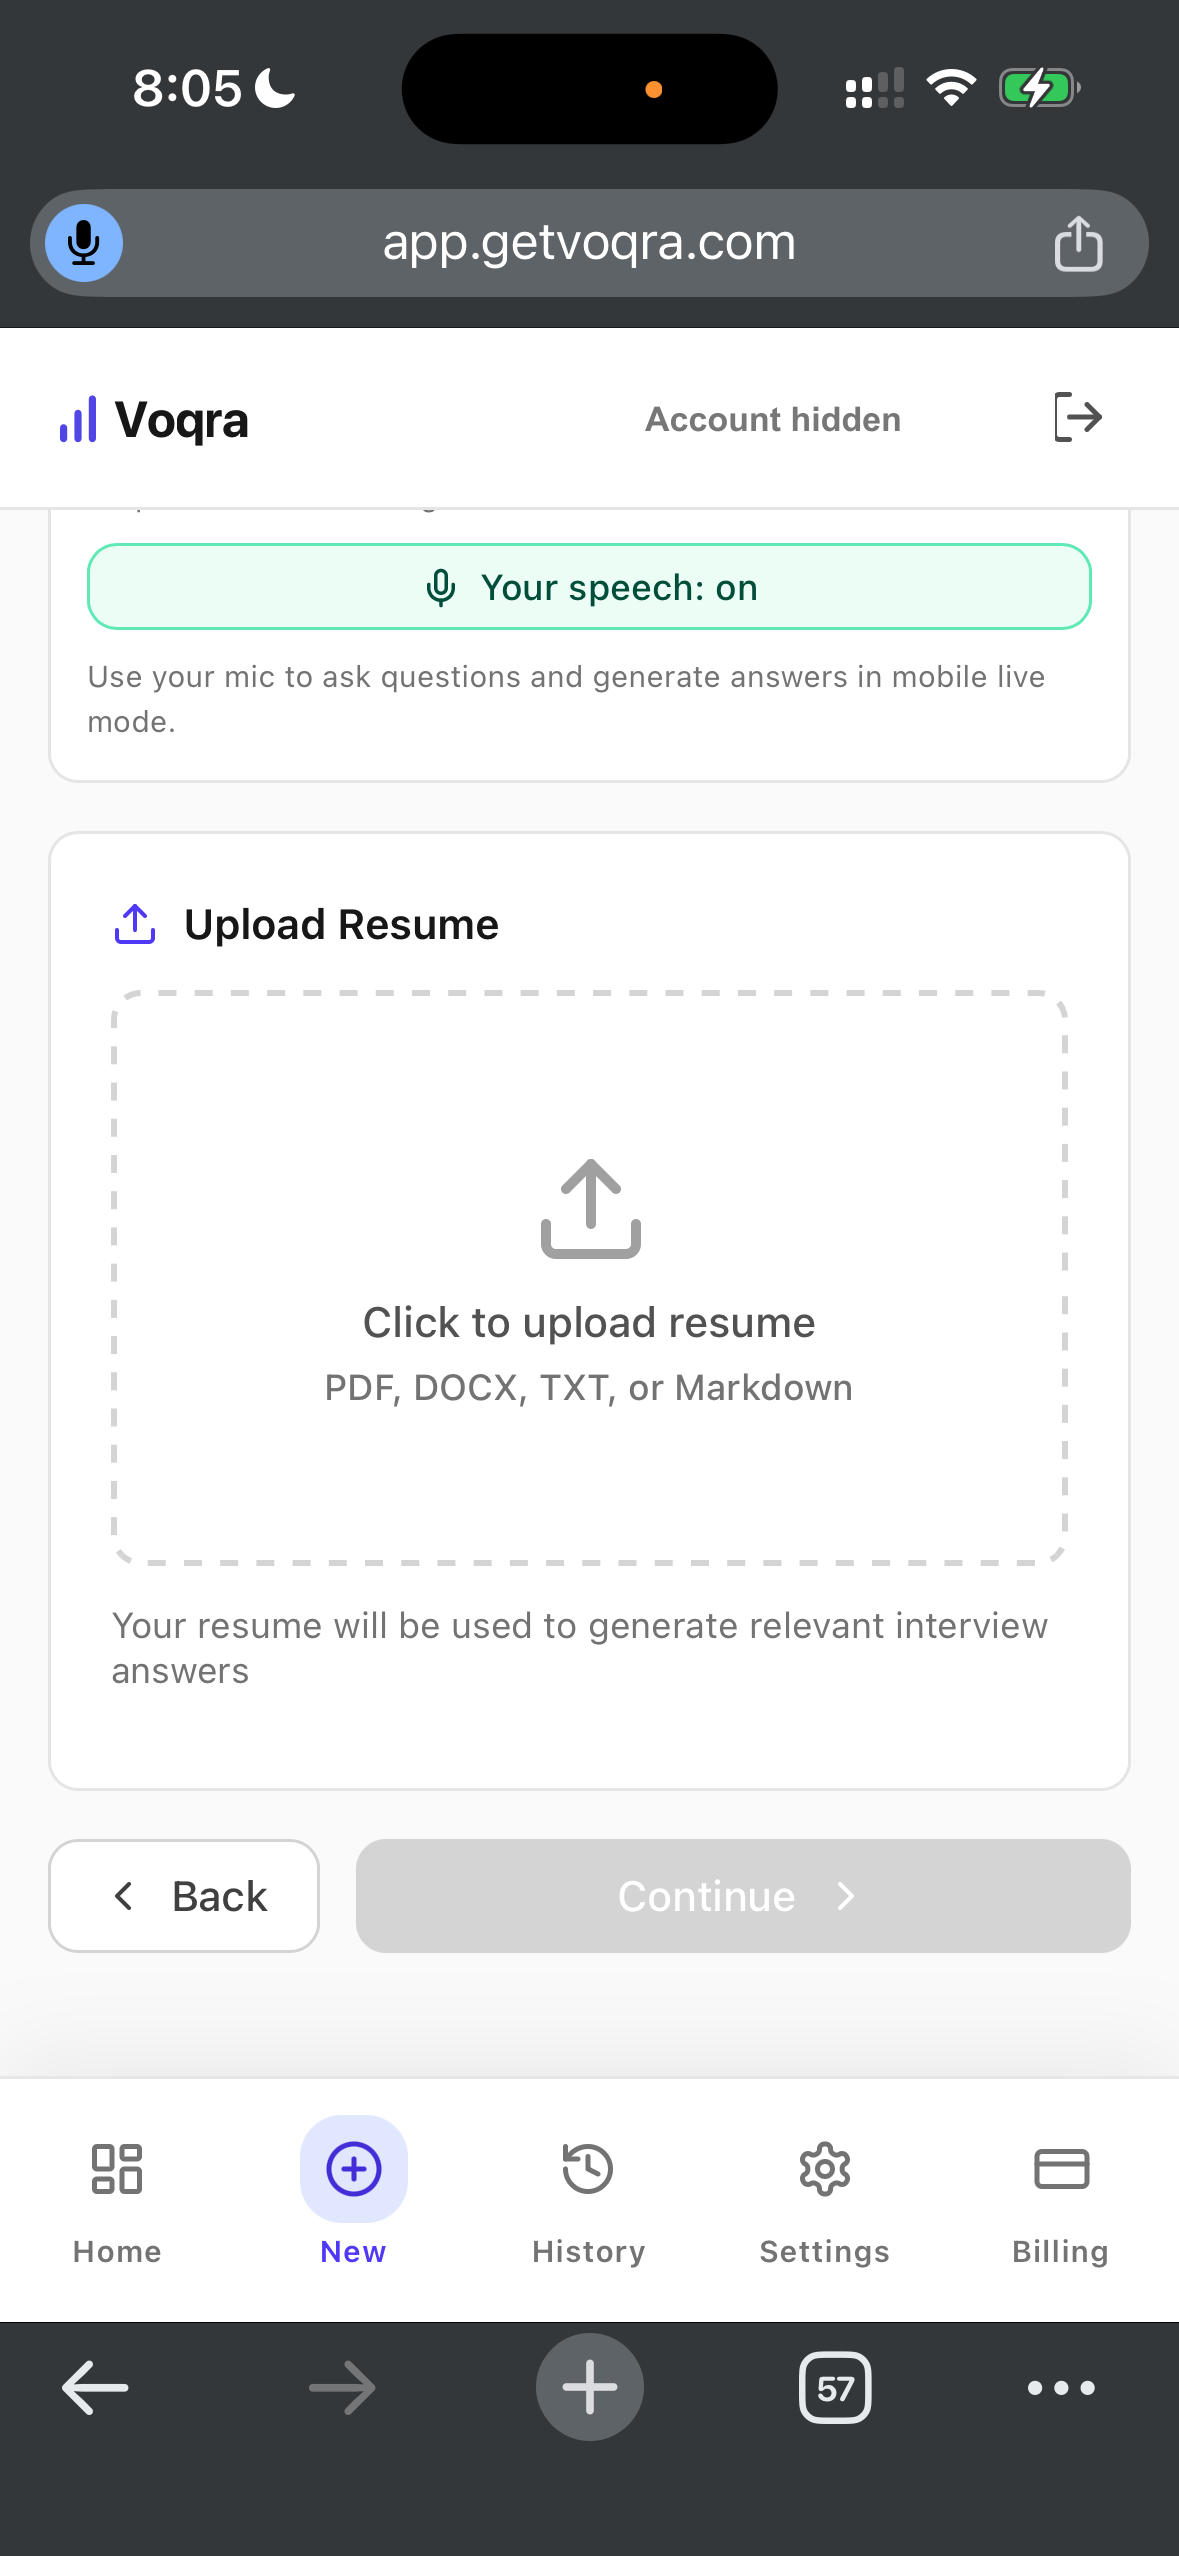
Your resume gives Voqra the background it needs to connect answers to your actual experience.
Step 6: Paste the job description
Paste the full job description into the setup form.
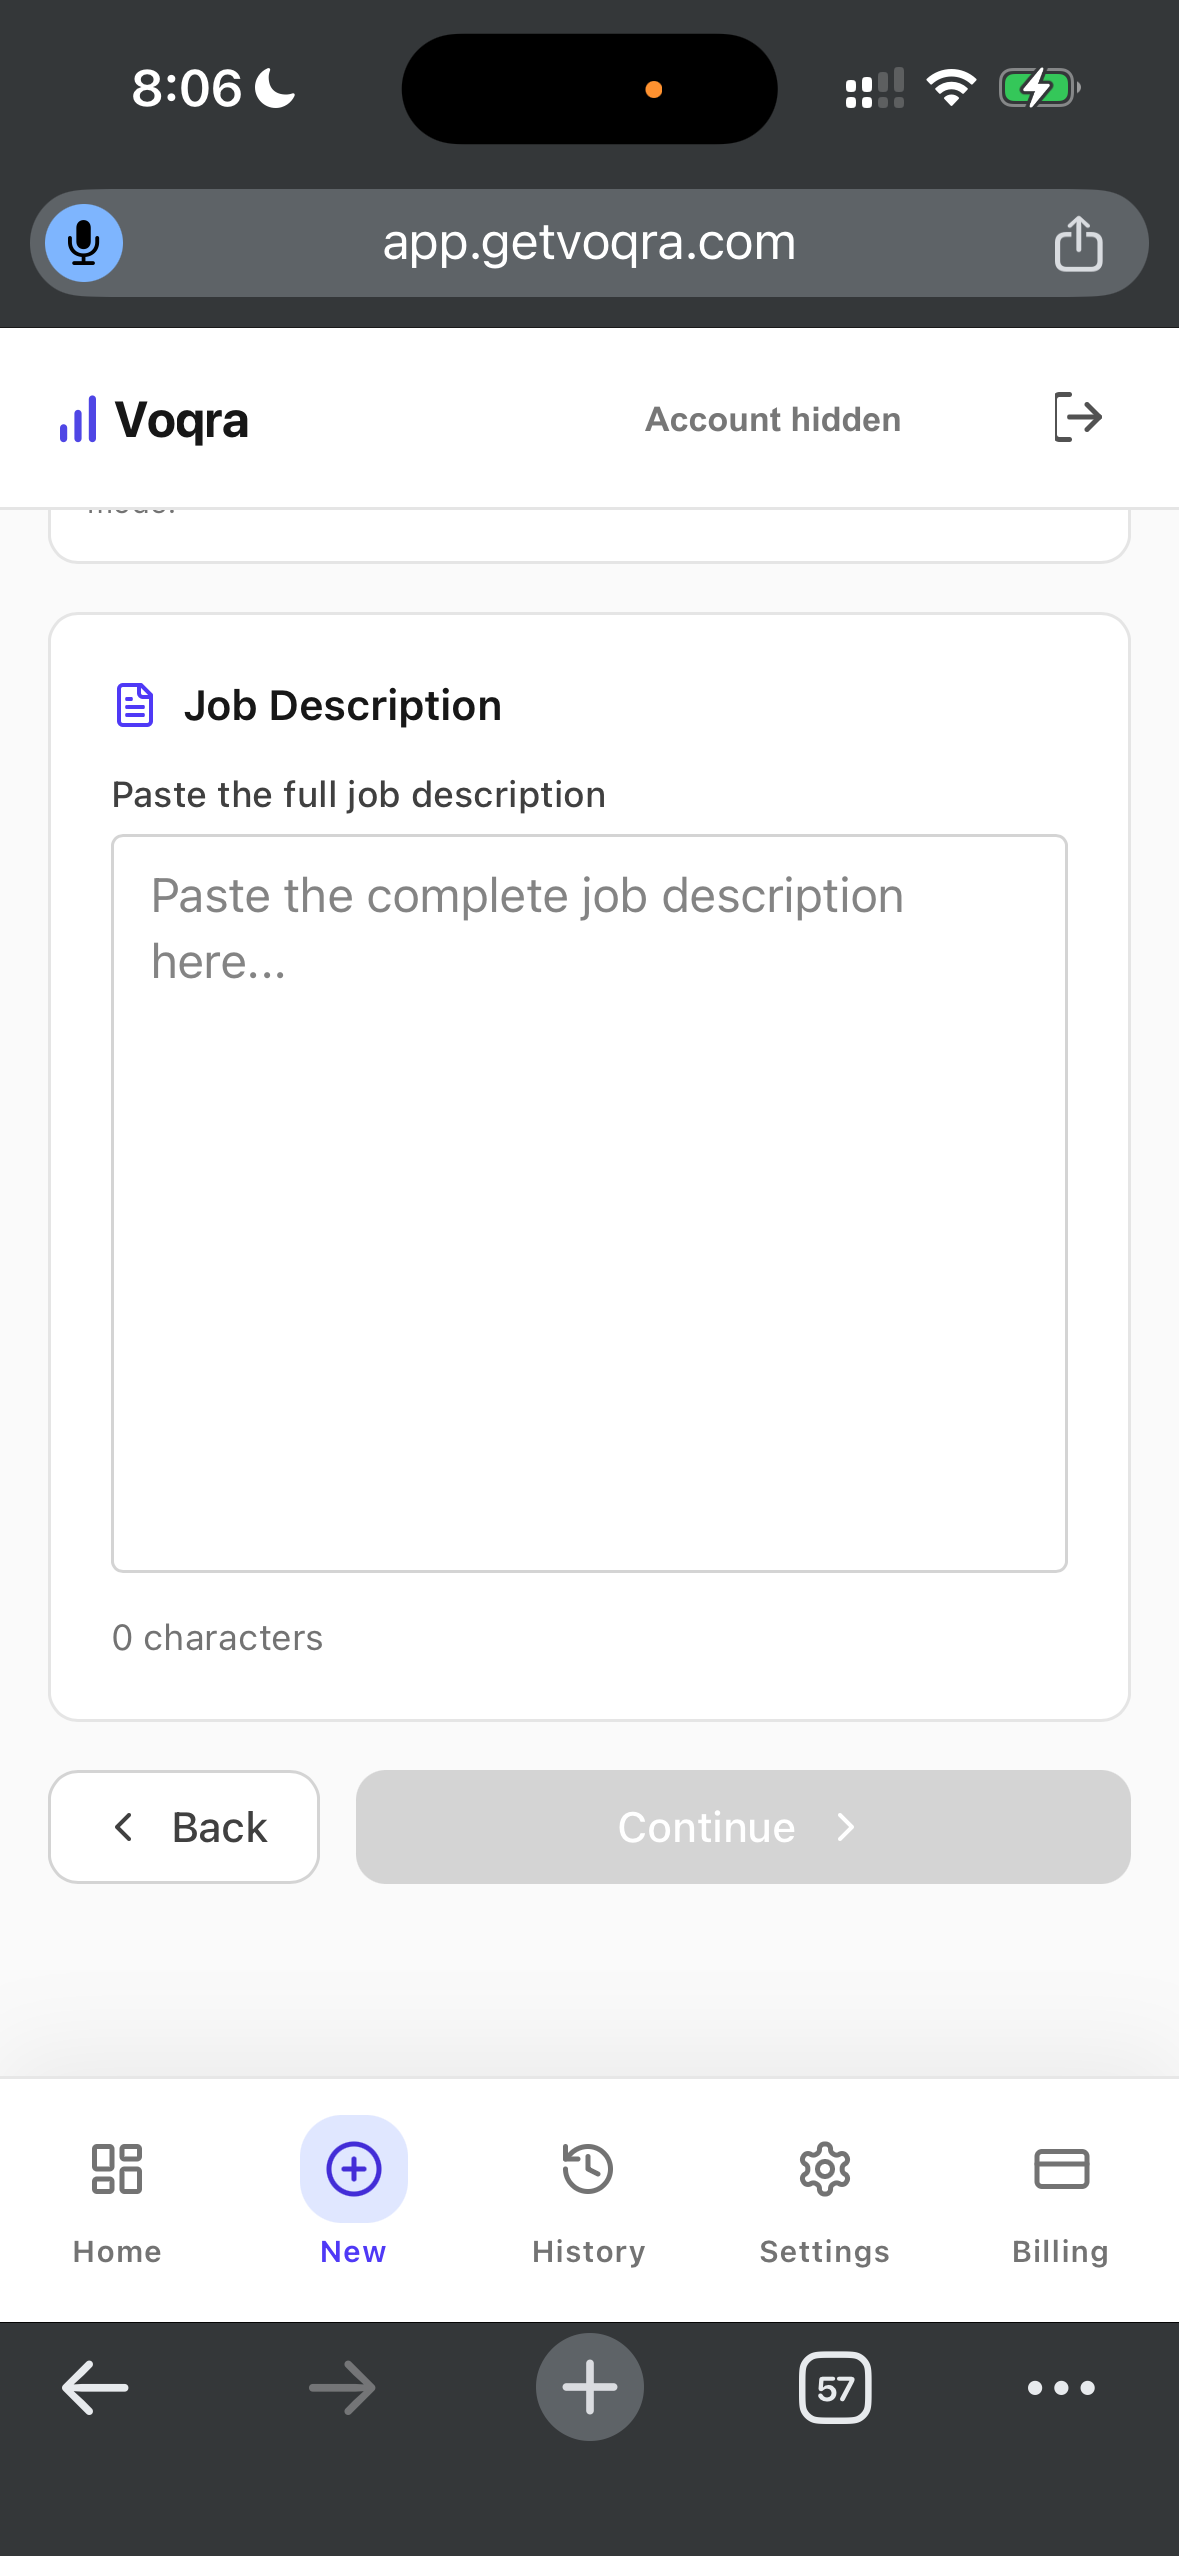
Include the responsibilities, requirements, and any product or team details from the posting.
Step 7: Add optional notes and start
Use notes for talking points, questions, examples, or reminders. When the setup is ready, choose Start Interview.
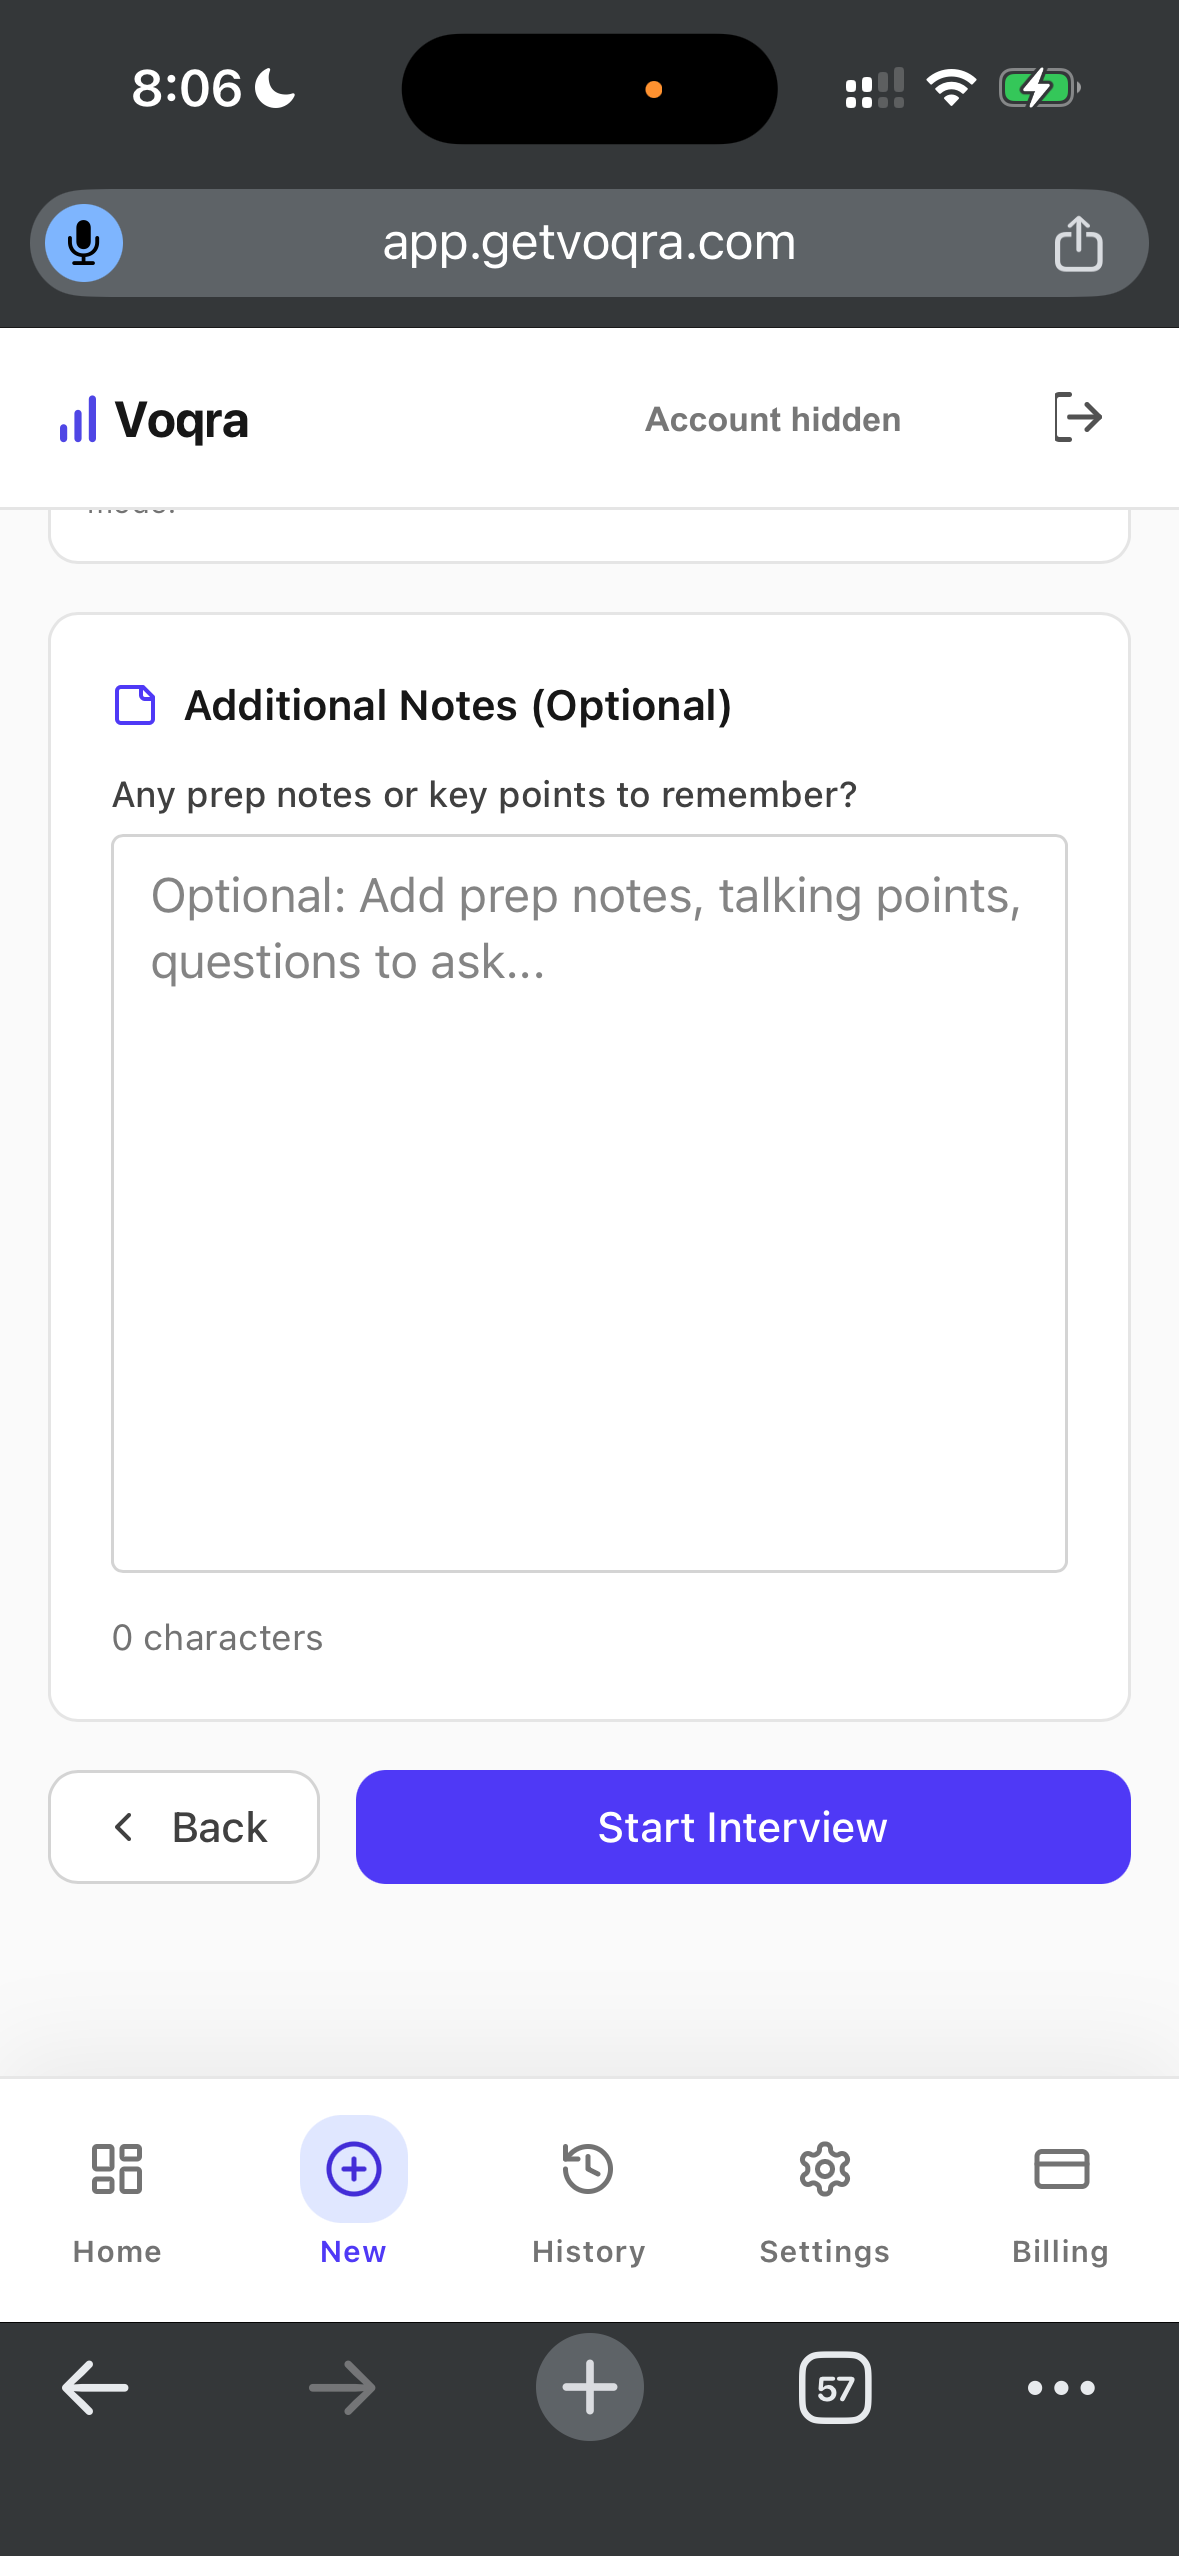
Notes are optional, but they are useful when you have specific stories or metrics you want to remember.
Step 8: Use the mobile live session
After the session starts, Voqra shows the mobile live view.
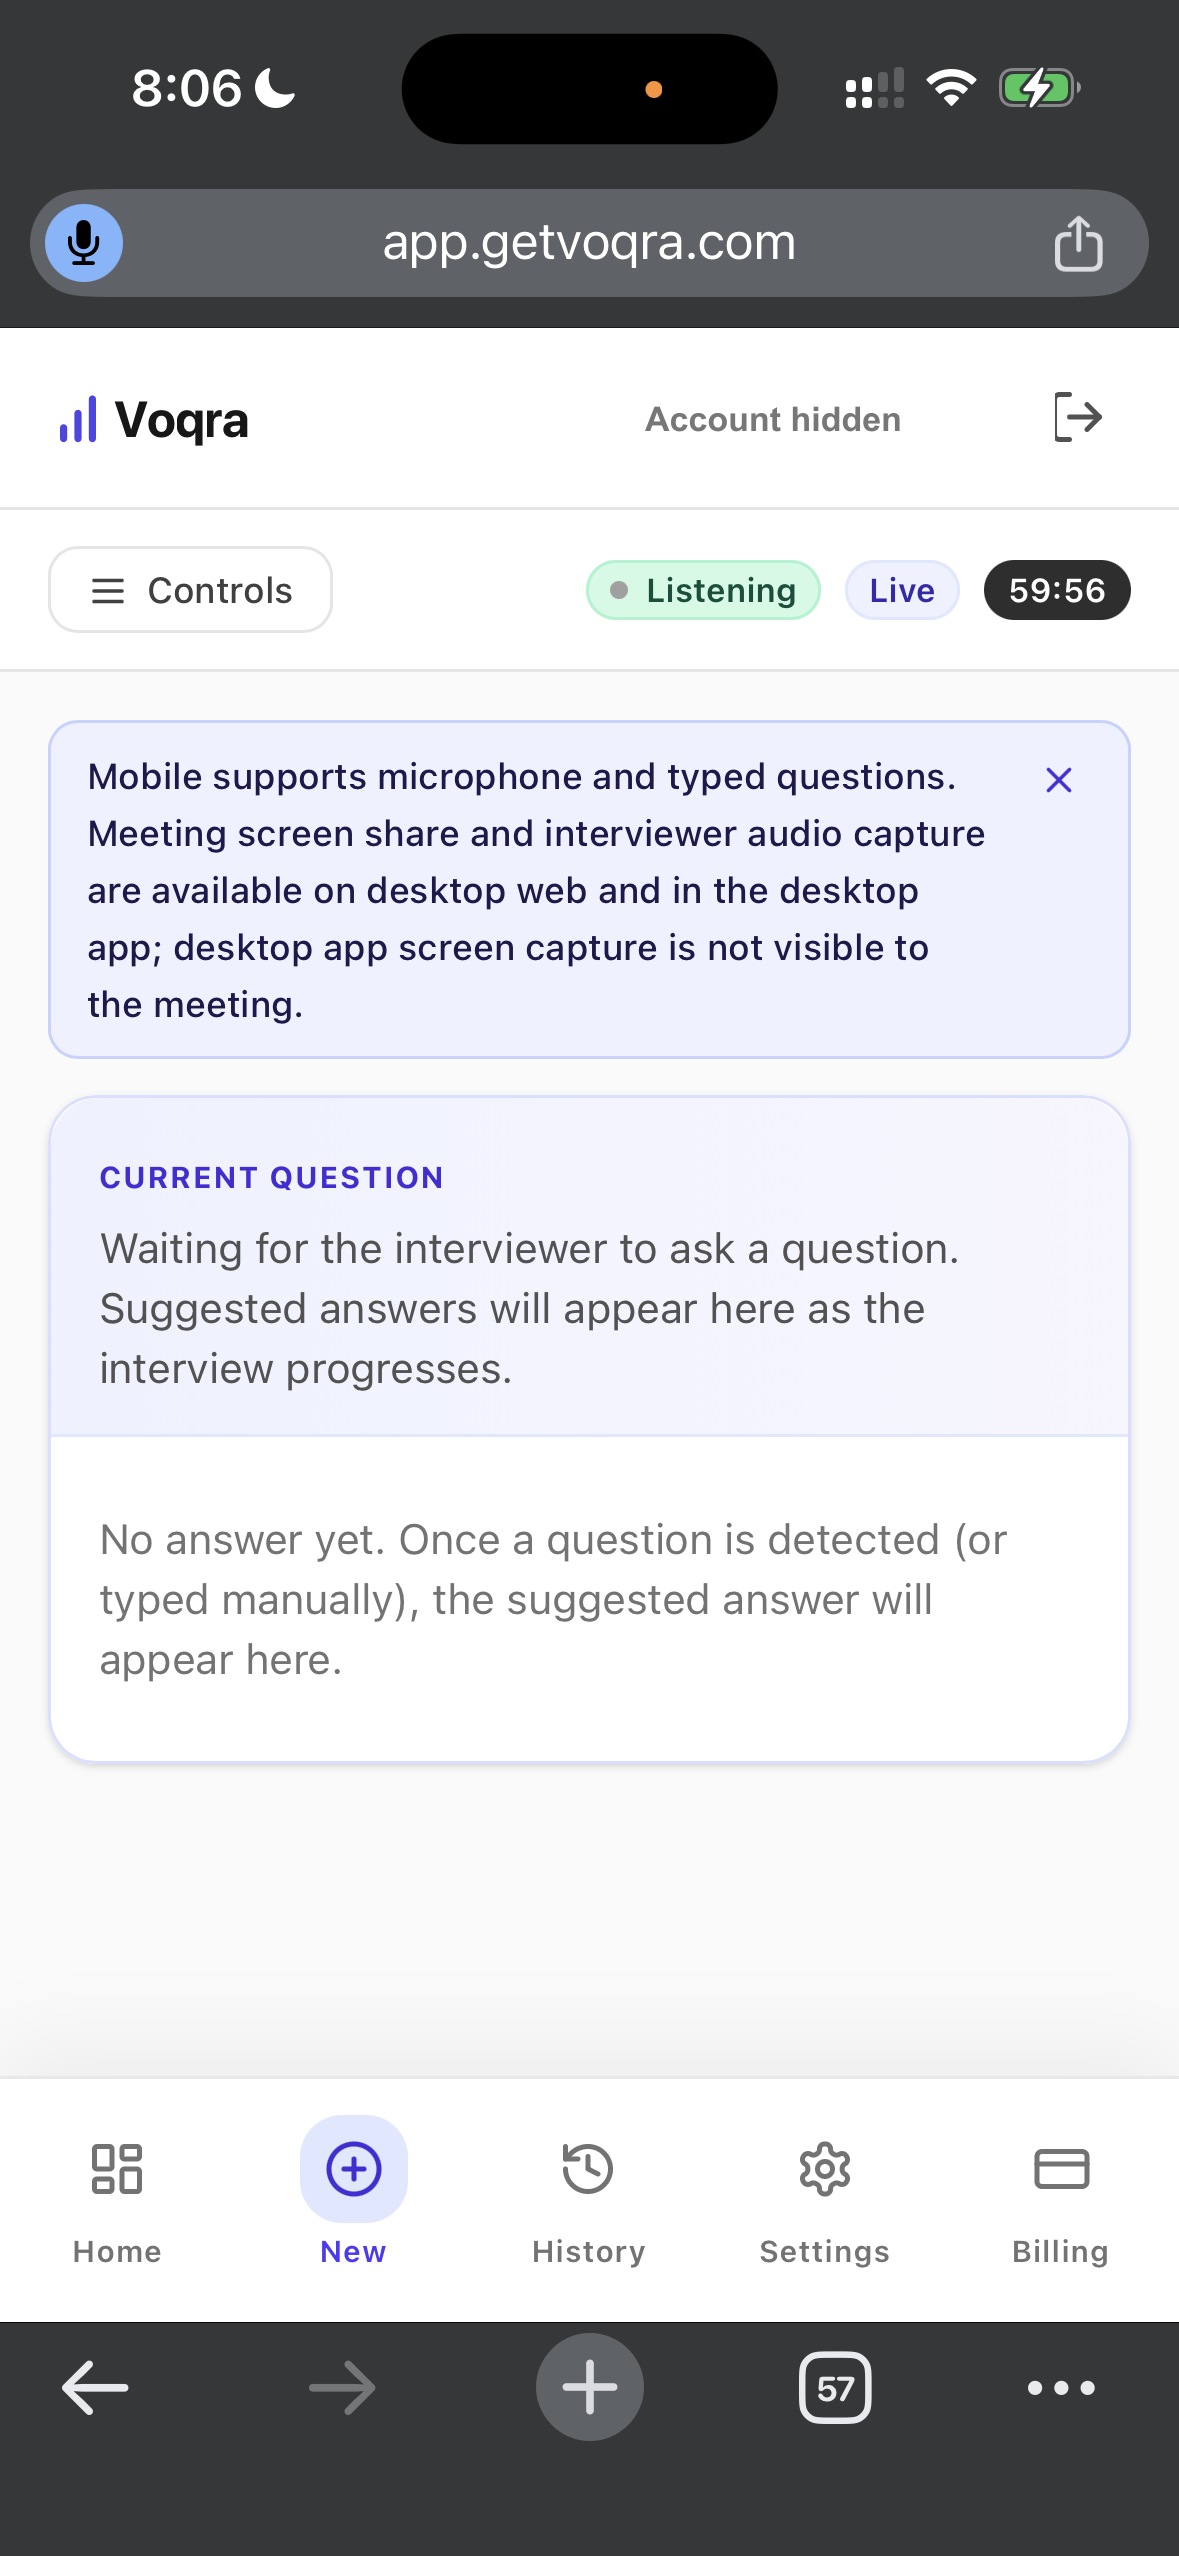
This is useful for:
- practicing answers out loud
- testing how you would answer a common question
- typing a question you expect in the interview
- reviewing answer structure before the call
For real meeting audio, screen share, and live screen context, switch to desktop web or the desktop app.
Recommended end-to-end workflow
If you want the smoothest path, use this sequence:
- Use mobile or desktop web to collect your resume, job description, and prep notes.
- Install and open the desktop app before the interview day.
- Create the session with company, role, resume, job description, and notes.
- Choose Practice if you want to rehearse first.
- Choose Live before the actual interview.
- Keep the overlay open and use suggestions as structure.
- End the session when the interview is finished.
- Review History and improve your stories before the next round.
That gives you preparation before the call, support during the call, and review afterward.
Common mistakes to avoid
Avoid these mistakes when using Voqra:
- waiting until the interview starts to install the desktop app
- skipping the resume or job description
- using vague prep notes
- reading generated answers word for word
- ignoring screen or microphone permissions until the last minute
- using mobile web for a full live meeting when desktop is available
- forgetting to end the session after the interview
Voqra works best when it has enough context and you use it as a calm support layer, not as a replacement for your own voice.
Final takeaway
Use the desktop app for real live interviews. Use desktop web when you want a browser workspace for setup, history, billing, and supported live sessions. Use mobile web when you want to prepare, practice, type questions, or review from your phone.
The strongest workflow is simple: prepare the session before the interview, use Voqra to stay structured during the conversation, then review what happened afterward.
Try a live-style interview question
Use the Voqra demo to hear a realistic prompt and see how a candidate-ready answer is generated.
Frequently asked questions
Which Voqra app should I use for a real interview?+
Use the desktop app when possible. It is the recommended option for live interviews because it is built for the private overlay, meeting audio, and screen-read workflow.
Can I use Voqra in desktop web?+
Yes. Desktop web works well for setup, dashboard, history, billing, and browser-based live sessions in supported browsers.
Can I use Voqra on mobile web?+
Yes, but mobile web is best for setup, review, typed questions, and microphone-based practice. For real meeting audio and screen context, use desktop web or the desktop app.
Do I need to upload a resume?+
For the strongest answers, yes. Voqra uses your resume, job description, company, role, and notes to make suggestions more relevant to your interview.
Can I review interview answers after the session?+
Yes. Use History to review past sessions, questions, generated answers, and notes after the interview.
Voqra Team
Interview preparation team
The Voqra team builds AI interview tools for candidates who want practical support before and during real interviews.
Related articles

How Voqra Helps During a Live Interview
See how Voqra helps candidates prepare context, understand interview questions, and generate clearer answer support during live interview sessions.

AI Interview Copilot vs Interview Assistant: What’s the Difference?
Learn the difference between an AI interview copilot and an interview assistant, when each framing matters, and how Voqra fits both use cases.

What Is an AI Interview Assistant and How Does It Help?
Learn what an AI interview assistant does, how it helps candidates practice and respond faster, and where it fits before and during live interviews.